Leveraging PixTeller Templates for Print-on-Demand Merch
Starting a design from scratch is often believed to be the best approach, but what if we tell you it isn’t?
With a bunch of creative, ready-made templates, PixTeller makes your imagination go wild and turns it into the most intriguing and funniest one.
Within minutes, you can launch multiple print-on-demand designs that sell.
Whether you’re building a custom T-shirt store or adding branded merch to your business, these templates simplify the design process while keeping it flexible.
To help you get started, this article will guide you through the process and the perks of using PixTeller templates for your print-on-demand merch.
What are Print-on-Demand (POD) Design Templates?
POD design templates give you a fast, reliable foundation for building your merchandise catalog on platforms like Printify and Printful. Each template comes pre-designed and production-ready, so you can instantly apply it to apparel, drinkware, posters, phone cases, tote bags, and more, then personalize it to match your brand.
Don’t worry if design isn’t your strength. The templates handle all the tricky parts, like color matching, layout, and image resolution. This helps you focus on what you want to say with your product and how you want it to connect with your audience.
Why templates over custom design, you ask?
- • Starting from a template lets you launch products quickly without waiting days or weeks to create a design.
- • Hiring designers or spending hours creating each design can drain your budget. Templates offer affordable, professionally designed options that anyone can customize.
- • Templates come with built-in print-ready designs, ensuring every design meets industry specifications for resolution, color modes, and sizing. This consistency means fewer print errors and higher-quality products.
- • When running a POD business, it’s necessary to create multiple products efficiently. You can reuse and adapt templates to produce digital prints, posters, or other merchandise to sell art online, helping you expand your offerings with minimal effort.
How to Leverage PixTeller Templates for Print-on-Demand Merch
FYI: Designing a POD merch isn’t always as easy as it sounds.
Picking templates, customizing designs, and getting everything just right so customers actually want to buy; that’s a process that can get messy fast.
But if you get the basics right by using PixTeller’s easy-to-use templates, you cut through the chaos and focus on what really matters: creating merchandise that speaks to your audience and sells.
Here’s a guide on how to utilize PixTeller templates to create your Print-on-Demand merch.
Step 1: Choose the template
On PixTeller’s homepage, go to the “Templates” tab and select your design based on your POD merch. For example, pixels (PX) for a T-shirt design template will generally be more than those of caps or phone cases.
Explore PixTeller’s template library to find ready-to-use designs for your T-shirts, mugs, posters, or tote bags, and start customizing them in just a few clicks.
Step 2: Customize your template in the PixTeller editor
Once you’ve picked your template, PixTeller drops you into the editor workspace. Here’s what you can adjust to create your print-on-demand merch:
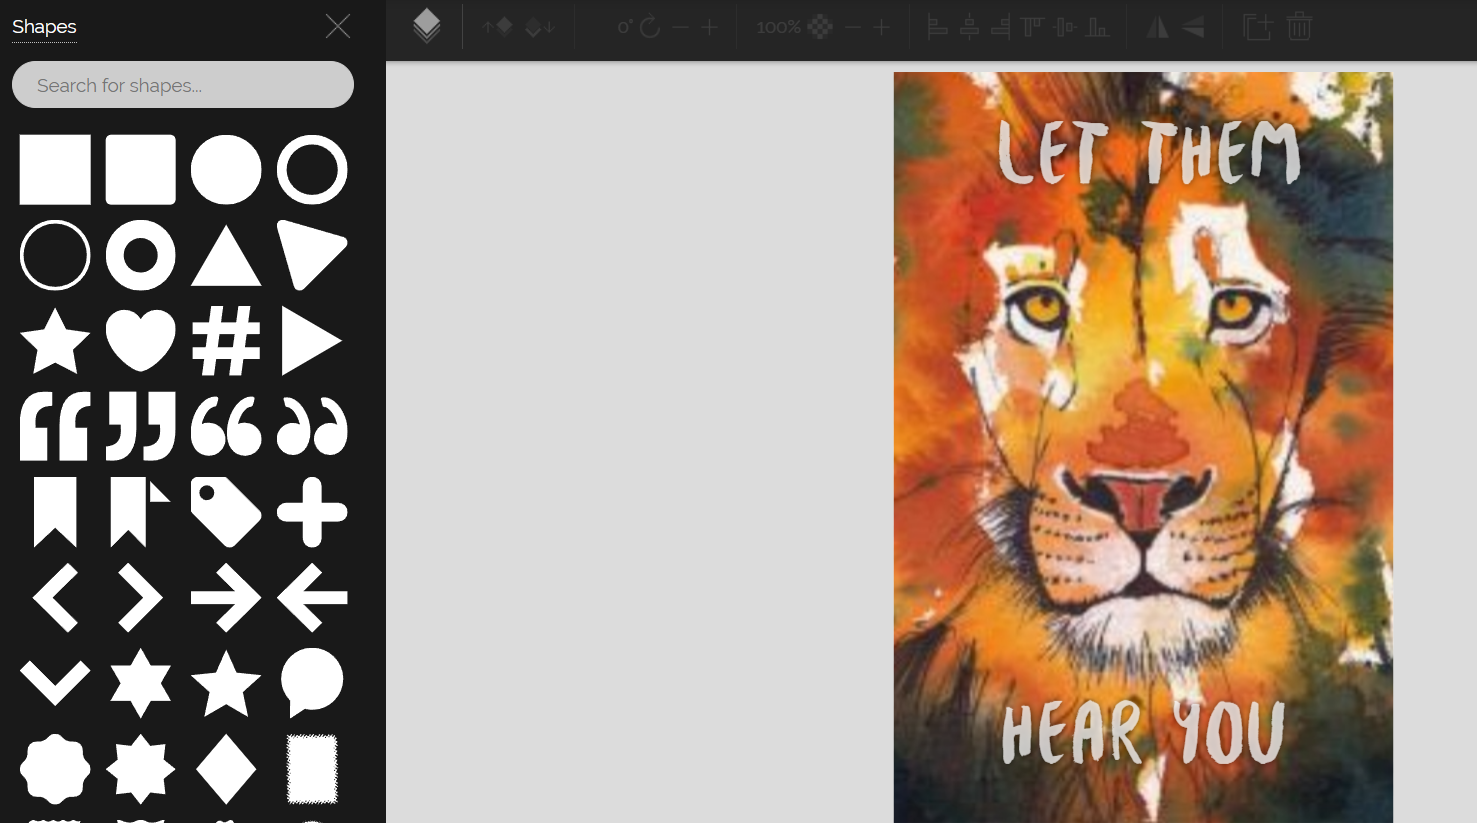
Shapes: Use the “Shapes” panel to drop in geometric forms, icons, or borders. Resize, recolor, or rotate these to match your design vibe.
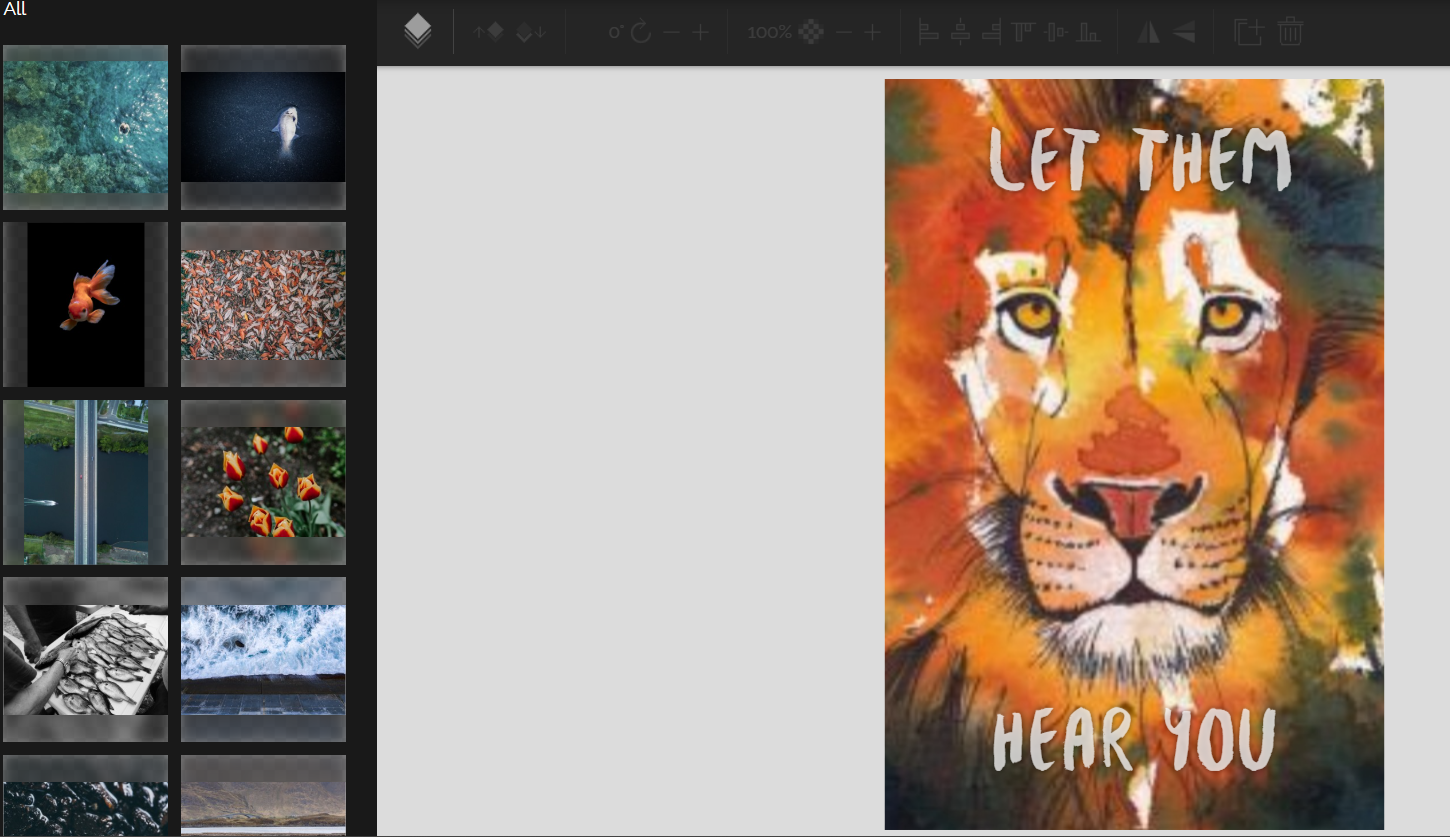
Images: Upload your own image or select from the list that best suits your merchandise.
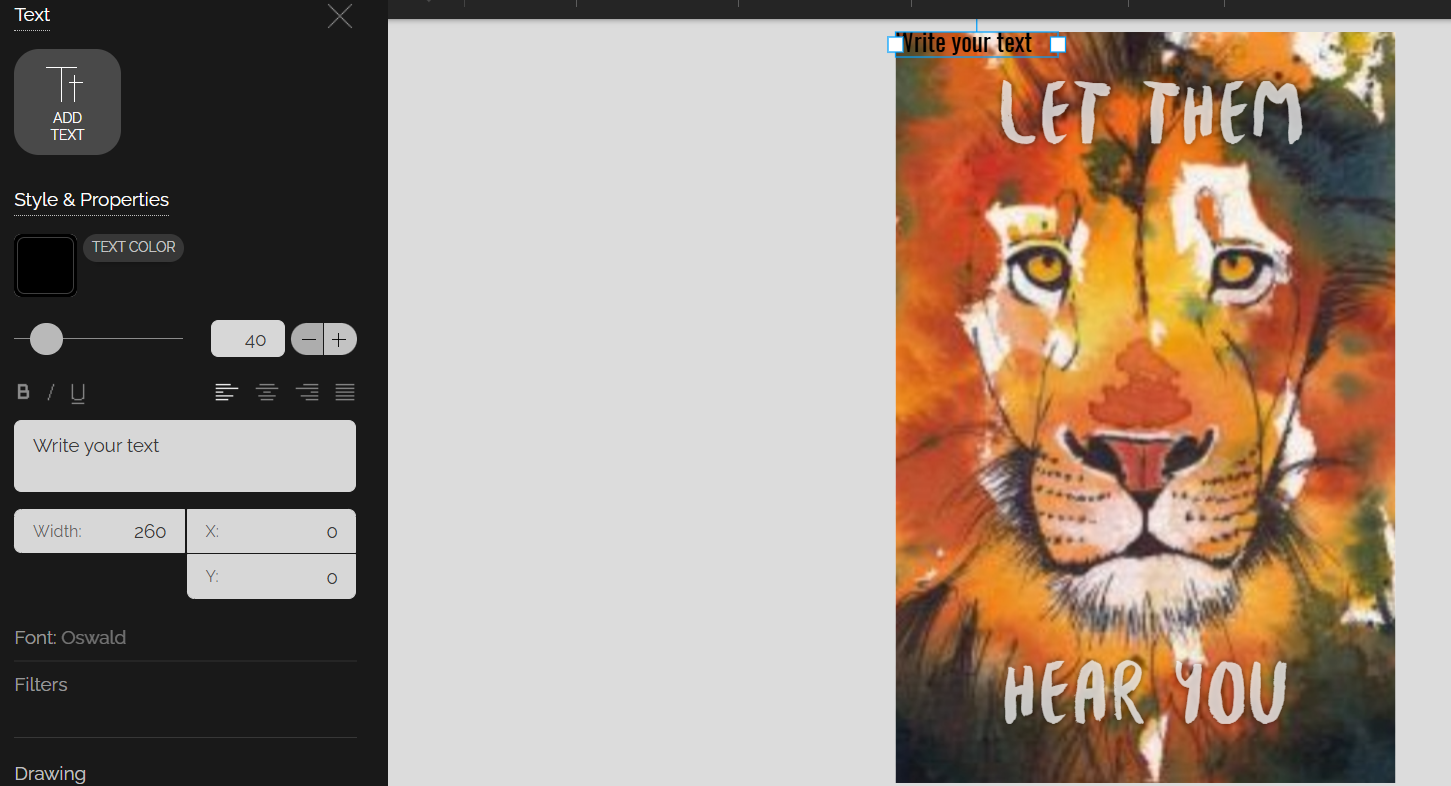
Text: Include additional text, change its color, size, and font.
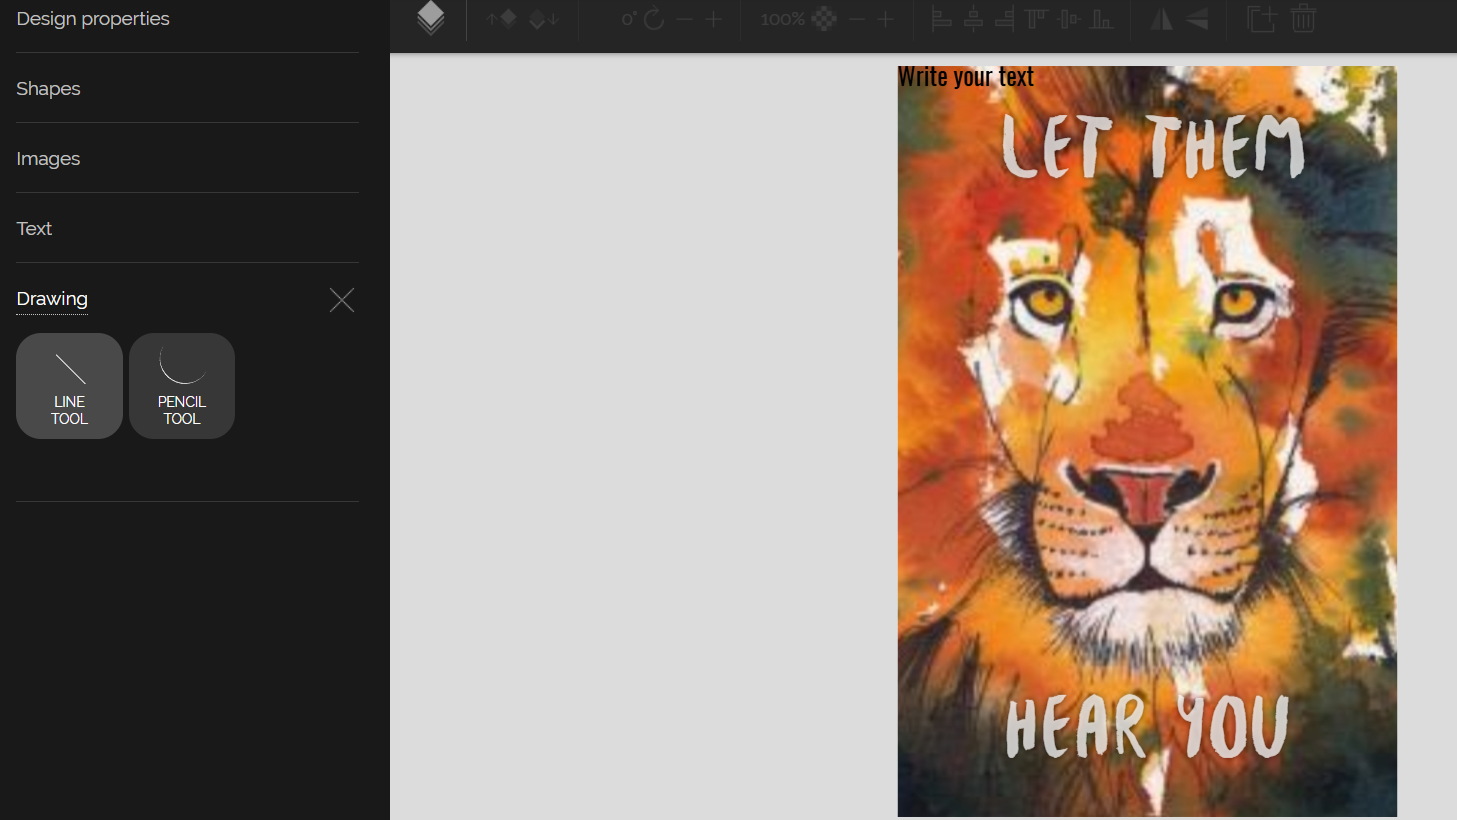
Drawing: Pixteller gives two options
- • Pencil tool to draw freehand directly on your canvas.
- • Line tool to draw straight lines easily to underline text or add borders.
It’s also possible to adjust the drawing’s border color, size, and type.
Animate: PixTeller lets you adjust the design’s:
- • Font size
- • Font color and
- • Total image’s size.
The animate option also provides tools to rotate the template, adjust opacity, and make necessary text alignments. This helps ensure your print-on-demand design looks exactly as intended before finalizing.

Step 3: Finalize your template design
After making all the adjustments, render the image and save ➜ download design for print.
Note: Preview multiple templates before committing. Sometimes, a design that looks perfect on a screen may require small tweaks for your specific product type, such as resizing graphics for a mug versus a T-shirt.
Why Choose PixTeller for your Print-on-Demand Merch?
Beyond easy design tools, PixTeller brings a few extra benefits:
- • Easy revisions and iterations: Quickly tweak your designs, test variations, or update seasonal collections without starting from scratch, saving time and reducing errors.
- • Fast, browser-based editing: Everything runs online, so you don’t have to install heavy software. You can edit, export, and publish from anywhere.
- • Consistent designs, every time: Duplicate your best work, keep brand colors uniform, and maintain a visual consistency across all your merch.
- • Extra value with animation tools: You can bring static designs to life for social posts or product teasers, using the same artwork you made for print.
- • Cost-effective for creators: With free and affordable plans, PixTeller lets small sellers design professional merch without outsourcing or paying per file.
What Makes a Great Print-on-Demand Template: Tips and Best Practices
The right templates set the tone for your merch and influence your sales. So, here are a few merch business tips and best practices to consider when using templates for your POD product.
- • Leverage trending topics and seasonal events: Align your templates with current trends or upcoming seasons to tap into timely demand. For example, you could create holiday-themed T-shirts, mugs, or even custom embroidery on hats and jackets to capitalize on a spike in gifting demand.
- • Speak to your tribe: Pick templates that match your audience’s interests. For example, Gregory DeCuir Jr. focused on college groups and customized templates specifically for Greek life apparel, which helped him grow a $240K business without holding inventory.
- • Optimize for print specifications: Align your templates with your product’s print specifications: use the correct resolution, color profile, and keep designs within the safe print area. A design made for a tote bag won’t work on a cap or phone case, so always use product-specific templates for the best fit.
- • Collect and act on customer feedback: Listen to your customers and focus on the designs they love. Keep the templates that sell well and tweak or drop the ones that don’t. Feedback can also inspire new variations, giving you a chance to expand your product line.
- • Put your own spin on it: While Templates help, adding your creativity and tweaking details can take your merchandise a long way. For example, UMAI Clothing utilized print-on-demand to test bold, anime-inspired designs, ensuring each design reflected their unique artistic vision. This personal flair helped them grow quickly and build a loyal fan base.
Final Thoughts:
Designing merchandise will always come with its own learning curve, involving new tools, new ideas, and a fair amount of trial and error. However, starting with print-ready format designs means you skip the most challenging part and get straight to creating high-quality designs that actually work.
Once you understand how to adapt them for your products and audience, you’ll spend less time fixing small details and more time refining what truly sells. Over time, that’s what turns a simple design workflow into a real, successful print-on-demand business that runs smoothly.
Until next time, Be creative! - Pix'sTory