How to Use PixTeller Animation Editor – Features Explained
I'm Alex from PixTeller and today, I'm psyched to show you most of our animation editor: functionality and features.
Why? Because in order to create outstanding designs, you have to know how to do it. Rest assured because our instructions are accessible and easy to follow. Once you go through this tutorial, nothing will stand in your way and you will be able to skillfully create original and first-class animations.
Here's what I'll cover in this post:
- 1. Step-by-step instructions to get familiarized with the features;
- 2. The final result - the animation you've created;
- 3. Link to other types of animations - So you won't waste time searching for them.
Are you ready to master PixTeller animation maker tool? Let's do it!
For today's tutorial, I will choose a template.
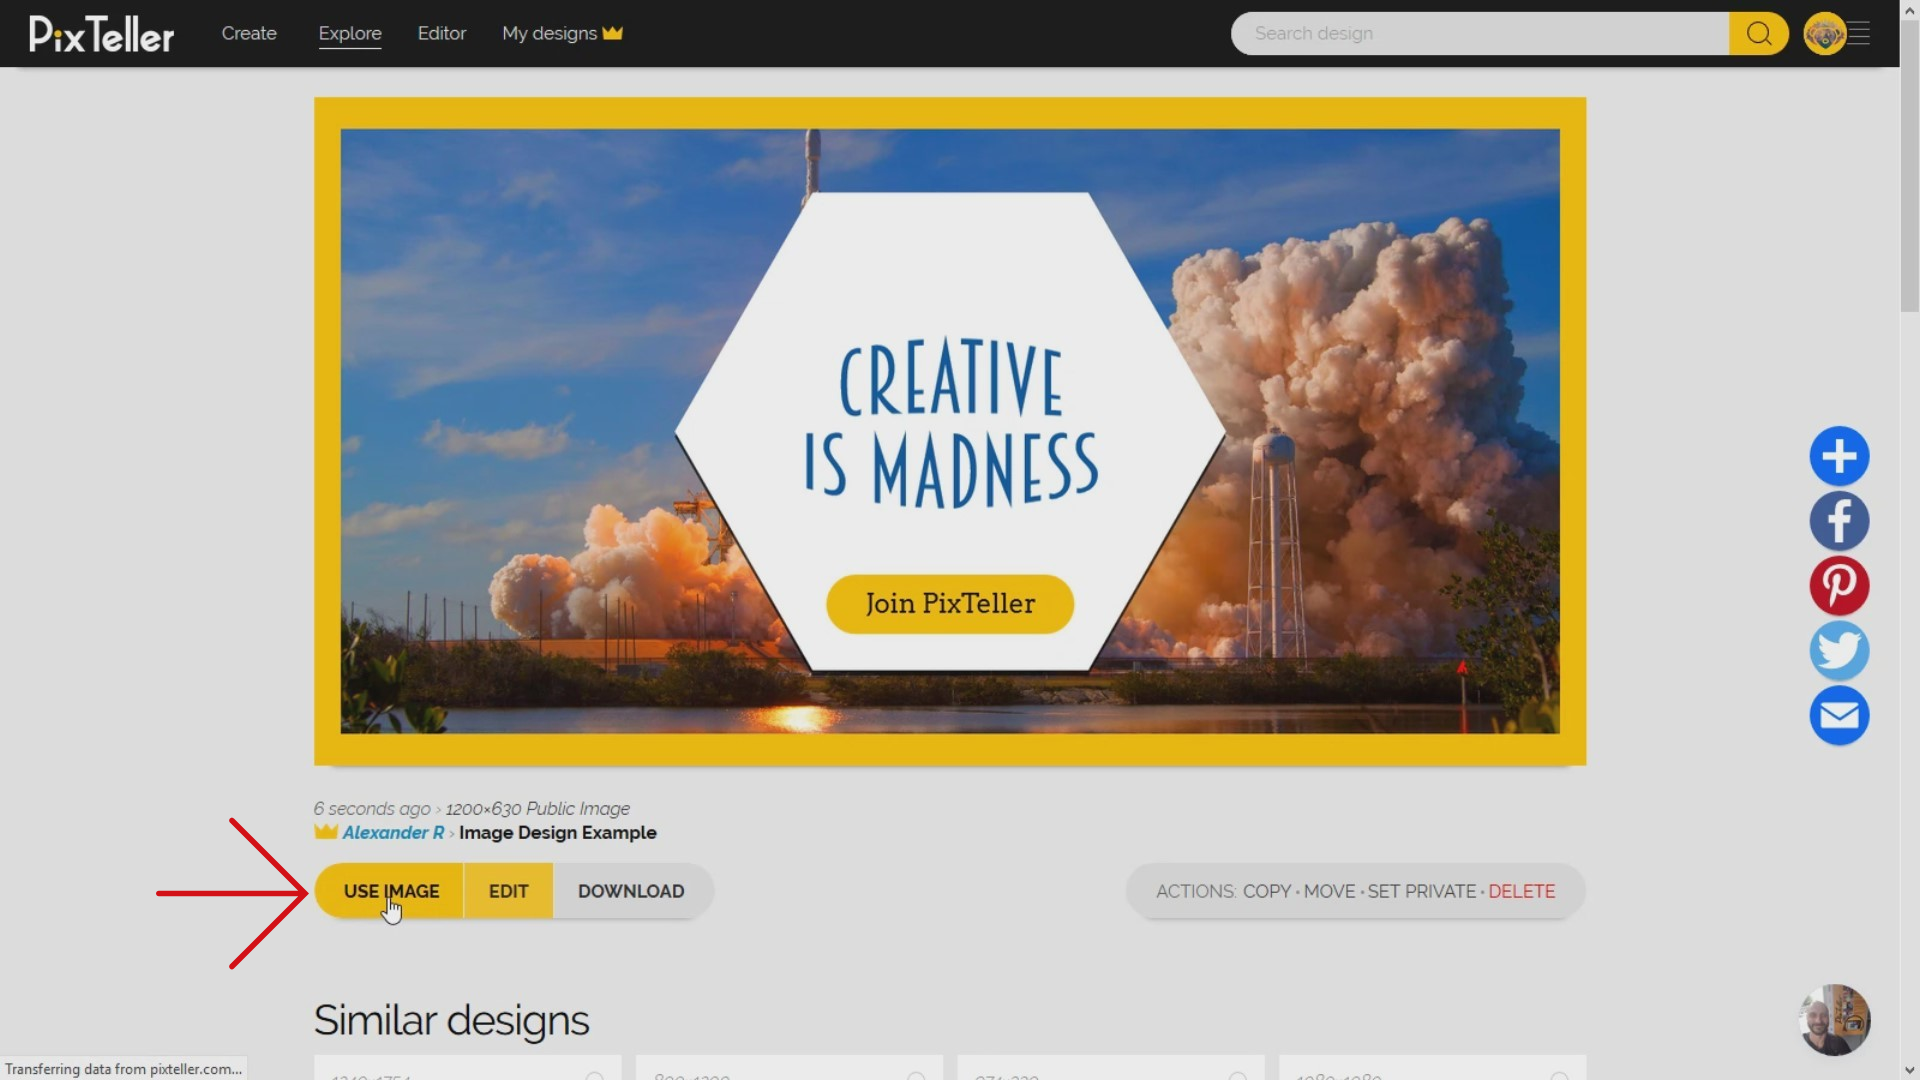
Now we're ready to start.
First, click on the "Use" button to make a copy of the starting premade design and open the animation tool directly in the browser window. Then you can customize it to create a new visual asset. Even if it's a new Image, Video or Gif, click on the "Use" button and let's make a short Video from it.
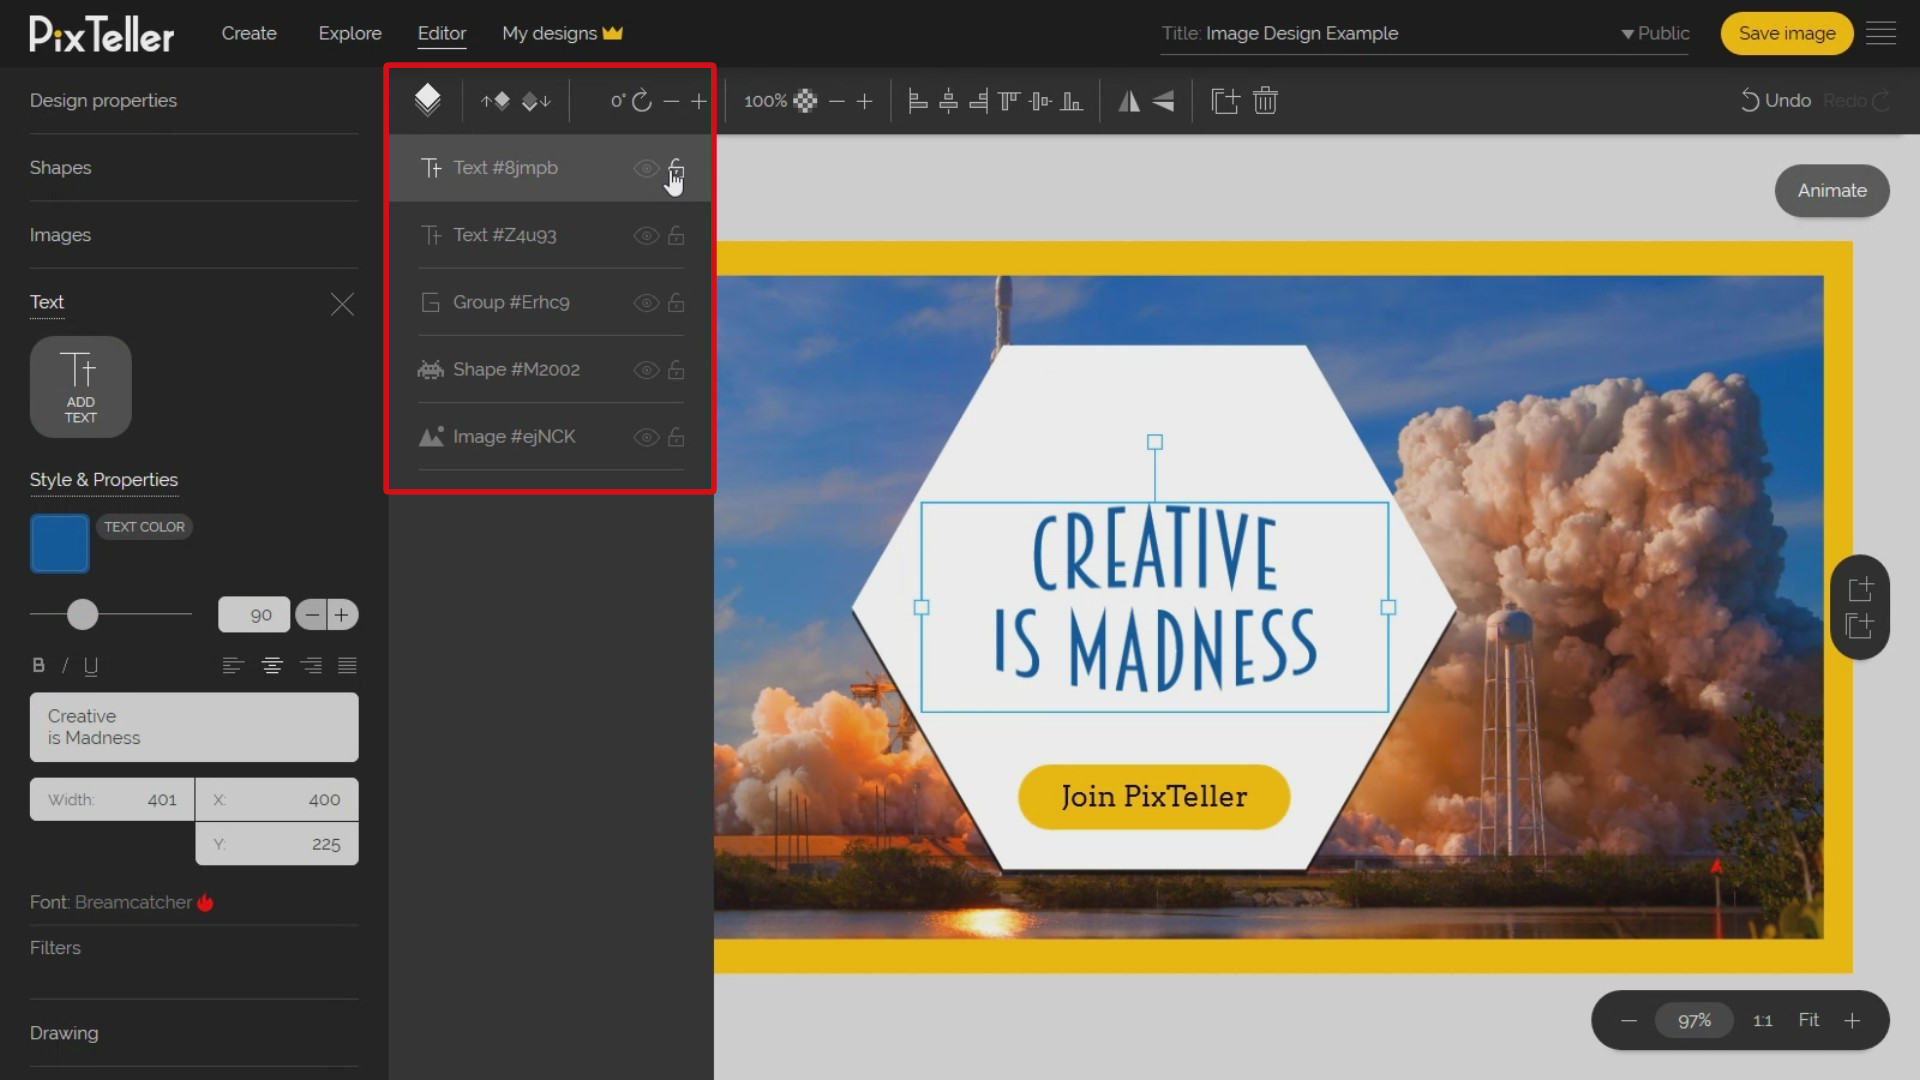
We're now in the PixTeller graphic editor, in the default design mode. First of all, let's have a look and see what elements I have in the image. You can see here on the page background, the button text element, the group of the shapes that creates the button, the big text element, the big shape that is behind and a photo.
If you wish to rearrange the order, it's easy! Over here you can see the layer menu located on the top menu. You simply have to hide or lock any element from the layer menu. Next, I'll show you the most amazing thing about PixTeller.
Have a look at the top-right of the canvas area, where you have the "switch to animation mode" button. You guys ready? By pressing this button, something awesome will happen - the editor will metamorphose. Yes, you heard it right. When I designed it, I was inspired by my teenage years when I would work a lot with Flash from Macromedia, which was afterward acquired by Adobe. For many years I considered Flash to be one of the most powerful software I'd ever used, and I thought it was really cool.
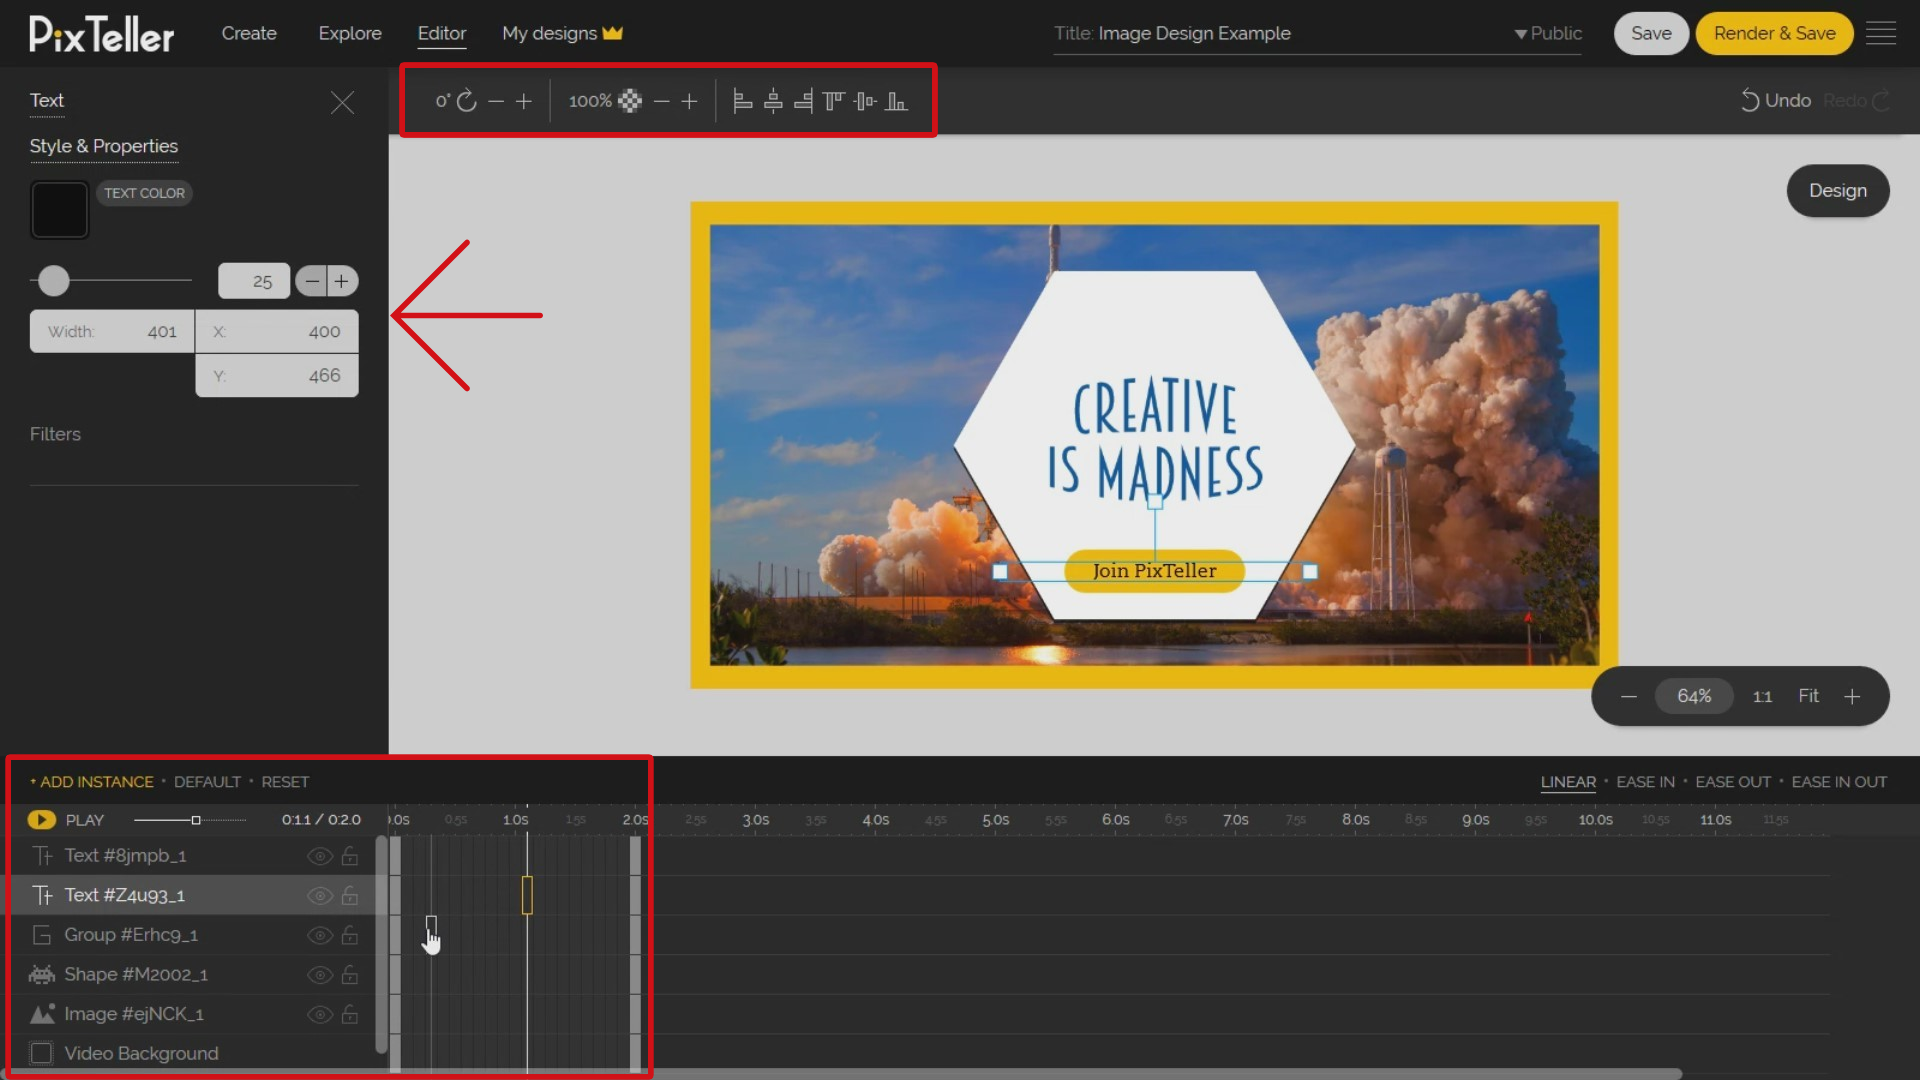
Ok, everyone, let's continue with our design. Now I'll show you some of the "Animation Mode" sections. The timeline is crucial for any animation creator.
If you're wondering why, it's because from the timeline you can set the total time length of the video. Plus, you can set how long an animation for an element can be, and you can create, move and delete instances. For any instance, you can change their related element properties and filters. Between two instances that have different properties, a video motion will be created, and by doing so, you have a lot of benefits. Just imagine you having thousands and thousands of possibilities to animate a single simple design. Mind-bending!
Remember that from the timeline, you can reset the instances to their default state from the design mode, and you can set the motion acceleration between two instances.
On the left side are the properties and filters panel for each element instance I have selected. Also, on the top, we keep the functions like rotate, opacity, and alignment, that can be used to create an animated gif.
Note: From the timeline, you can even reset the animation it entirely to default, if you think that something wrong has happened.
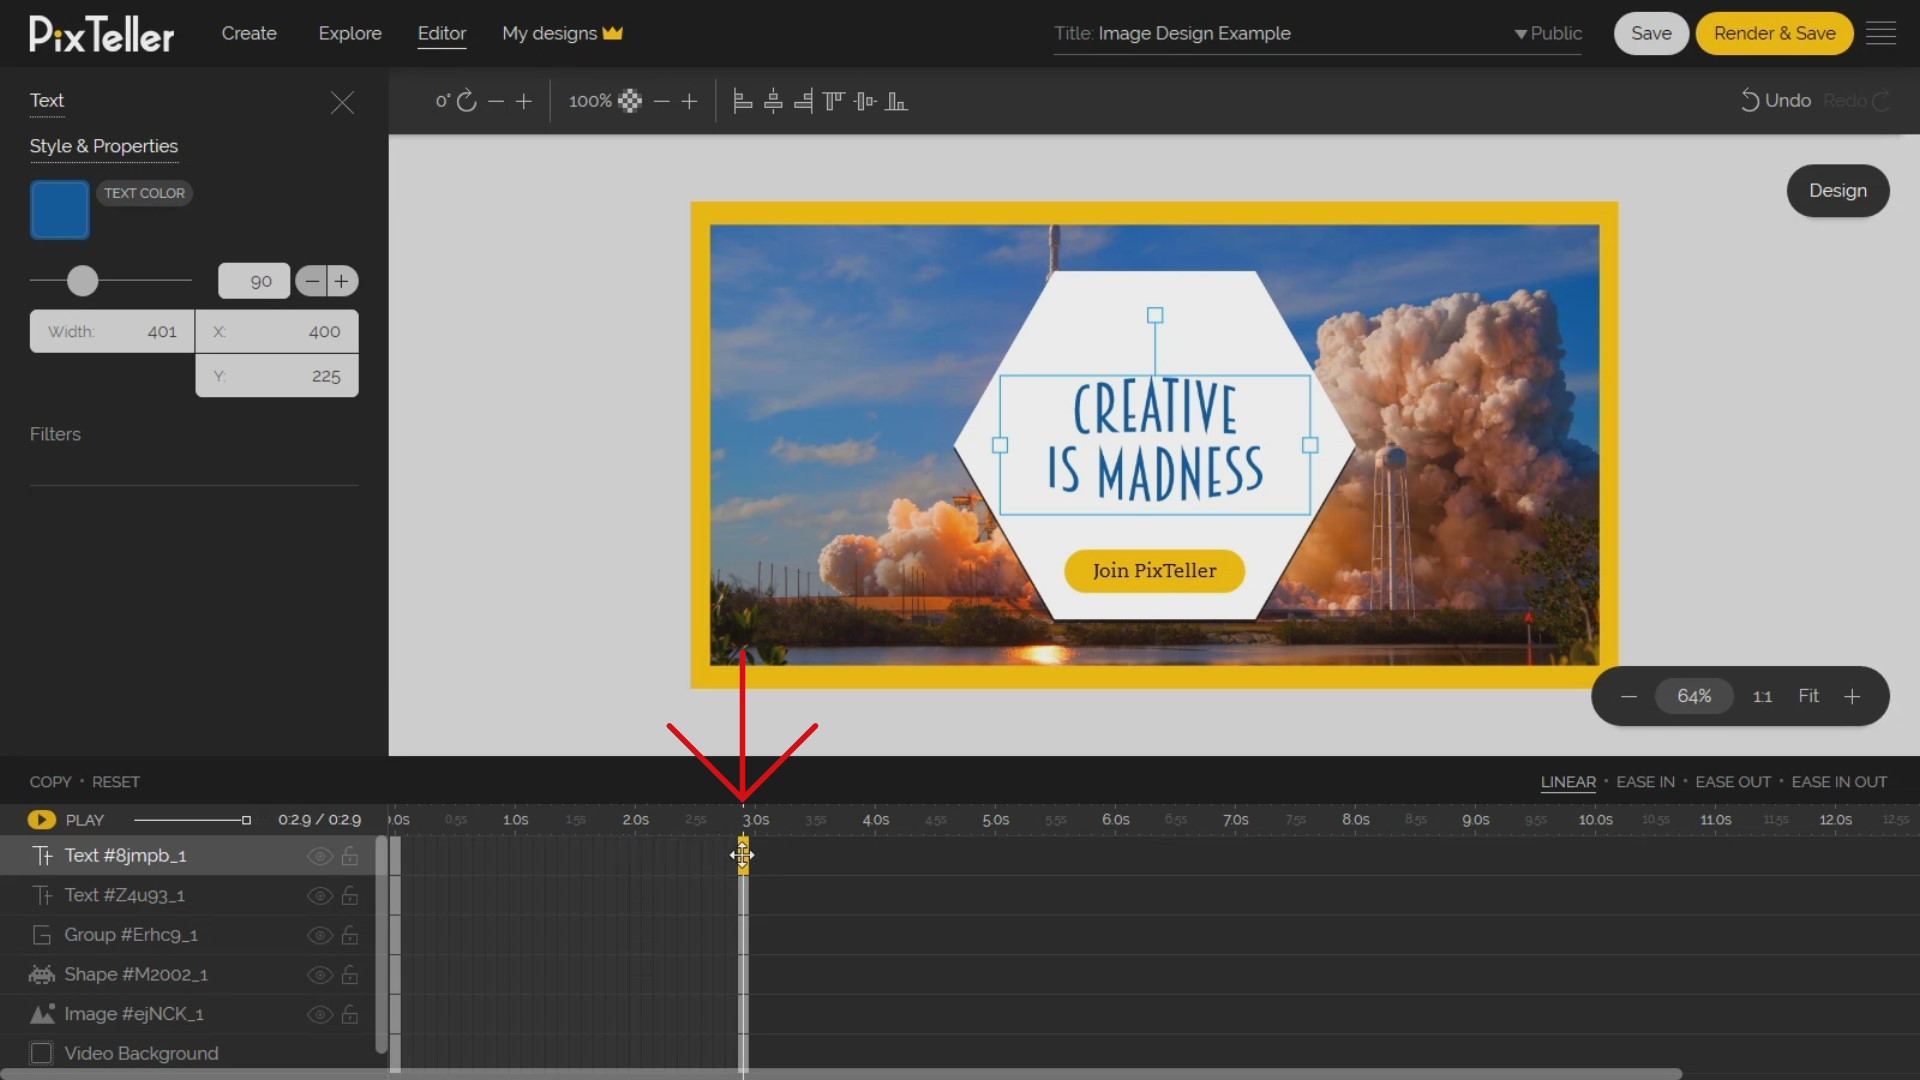
As you see here, I am preparing the timeline for a 2.9 seconds video length. To do that, I will move each last instance for the background and all the elements at the 2.9 seconds time. I must select the instance and move it to the right. The default time per page is two seconds, but you may change this at any moment, just like I am showing you right now.
Moving forward, let's animate the background by adding five more instances for the video background timeline.
To do that, you have two options. One is to select the frame and click on the "Add instance" button, and the second is to select the frame and change the background color property.
How? Just click on the background color from the left section panel and change the color to a new one. Once a new property is added to a frame, a new instance is created. As you see here, I will change the background color for the first instances I have created.
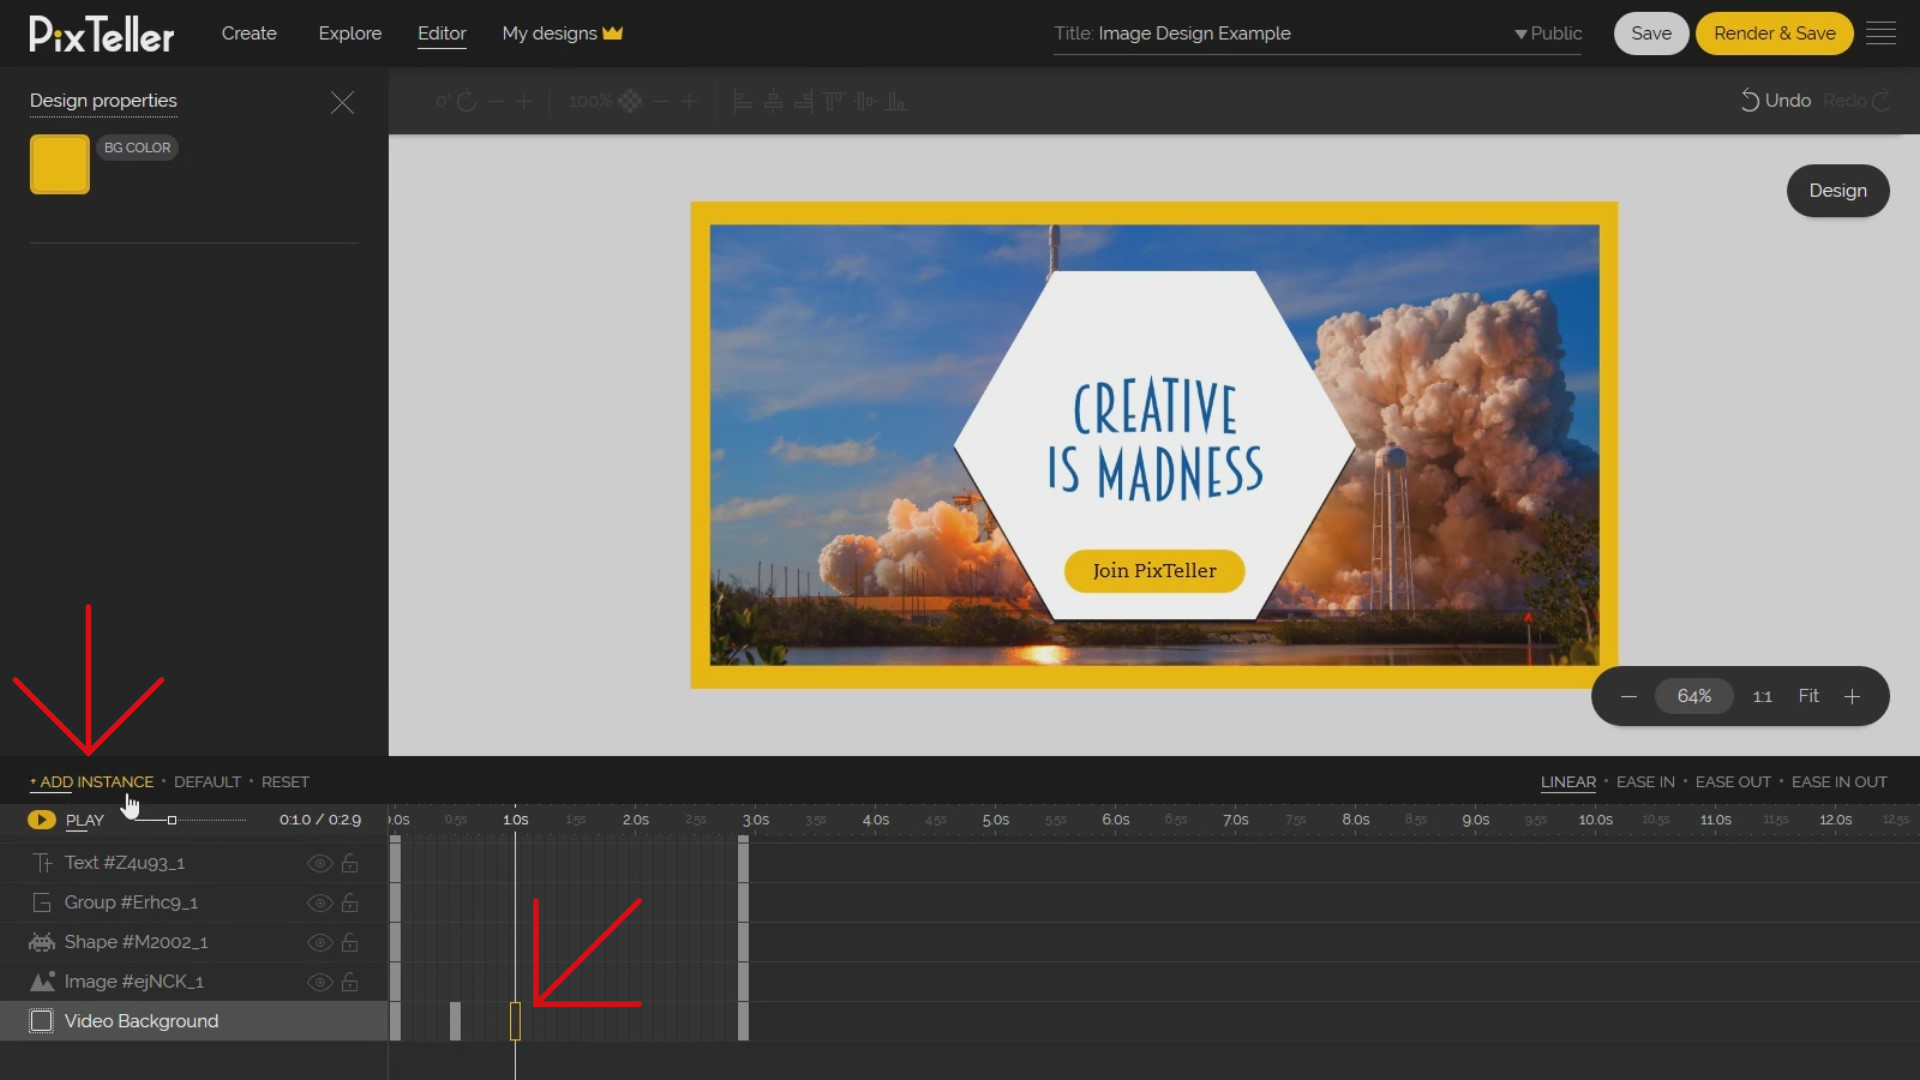
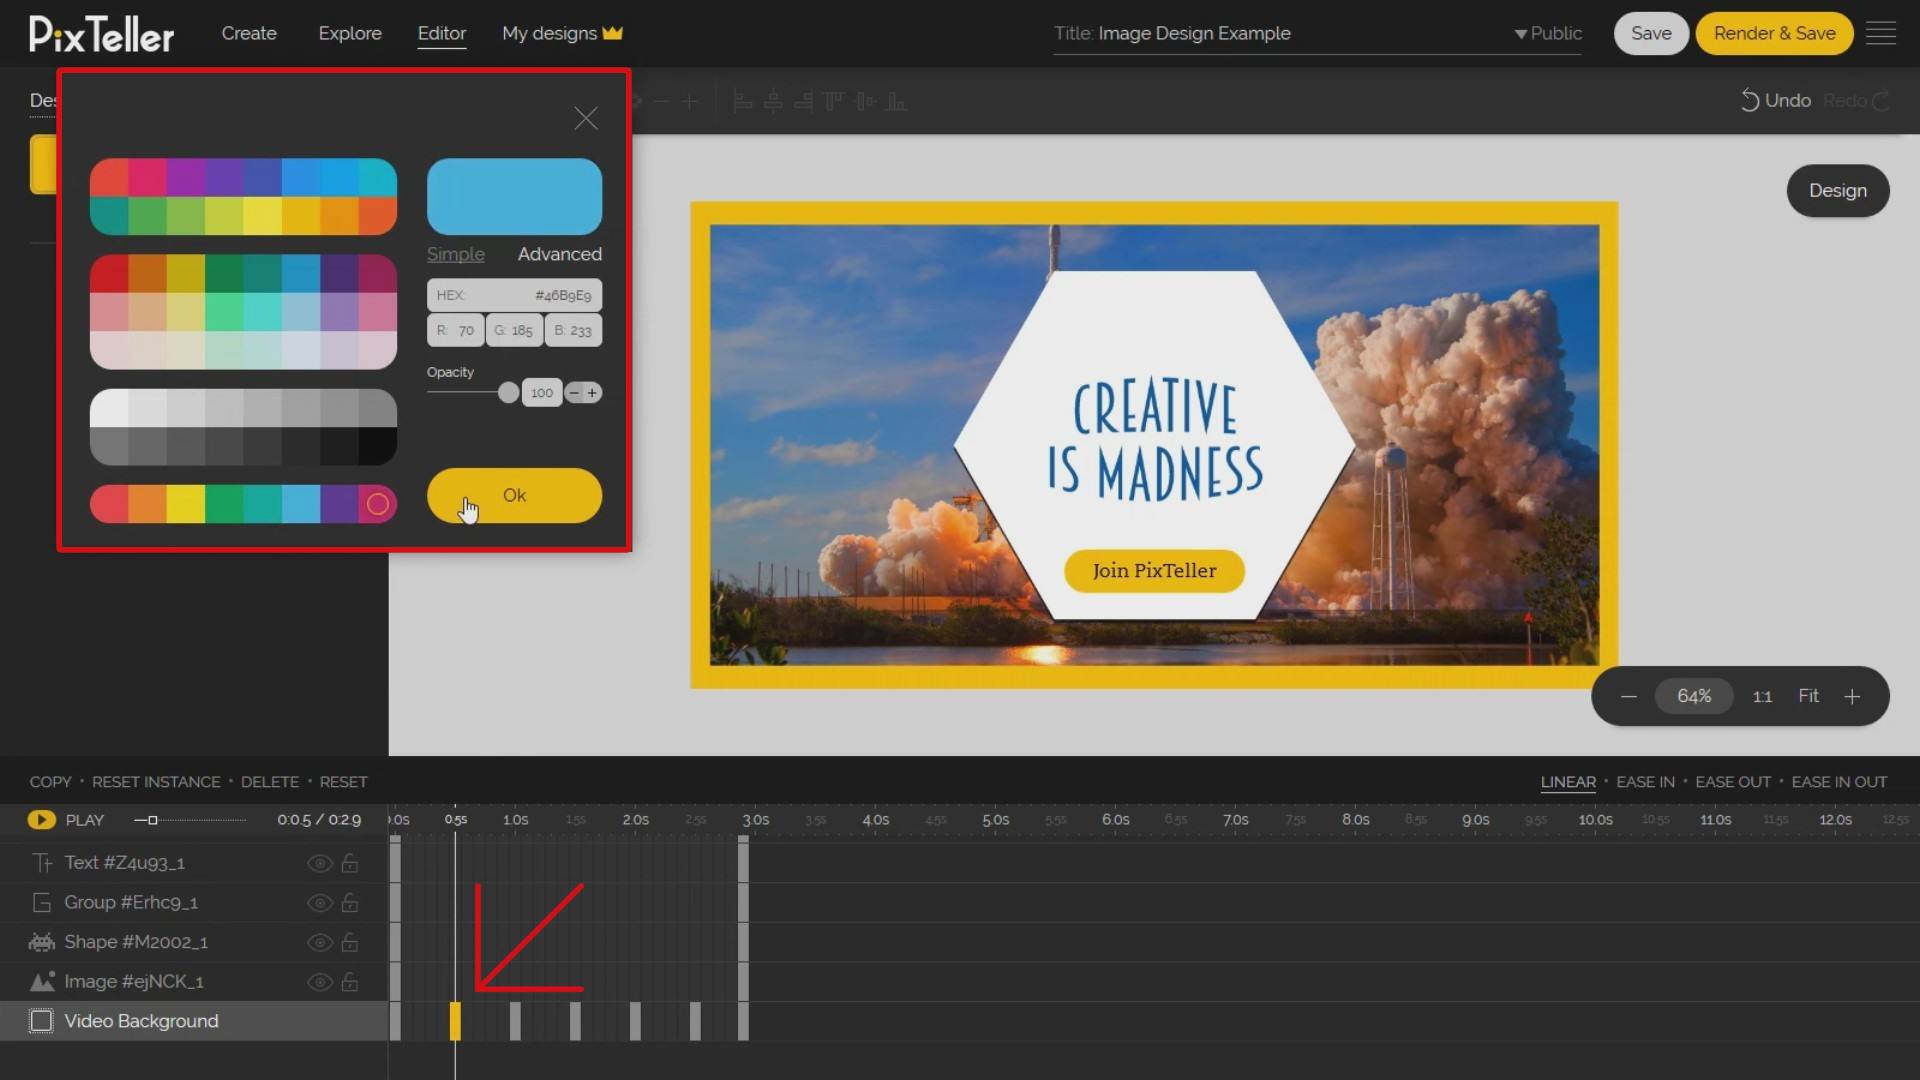
Once I set a different background color for each background instance, I already have an animation. To make sure of that, can click on any frame between 2 instances and you'll see that you have a different background color for each of the frames. Easy, right? Also, you can click the Play button to see a low-quality version of the animation.
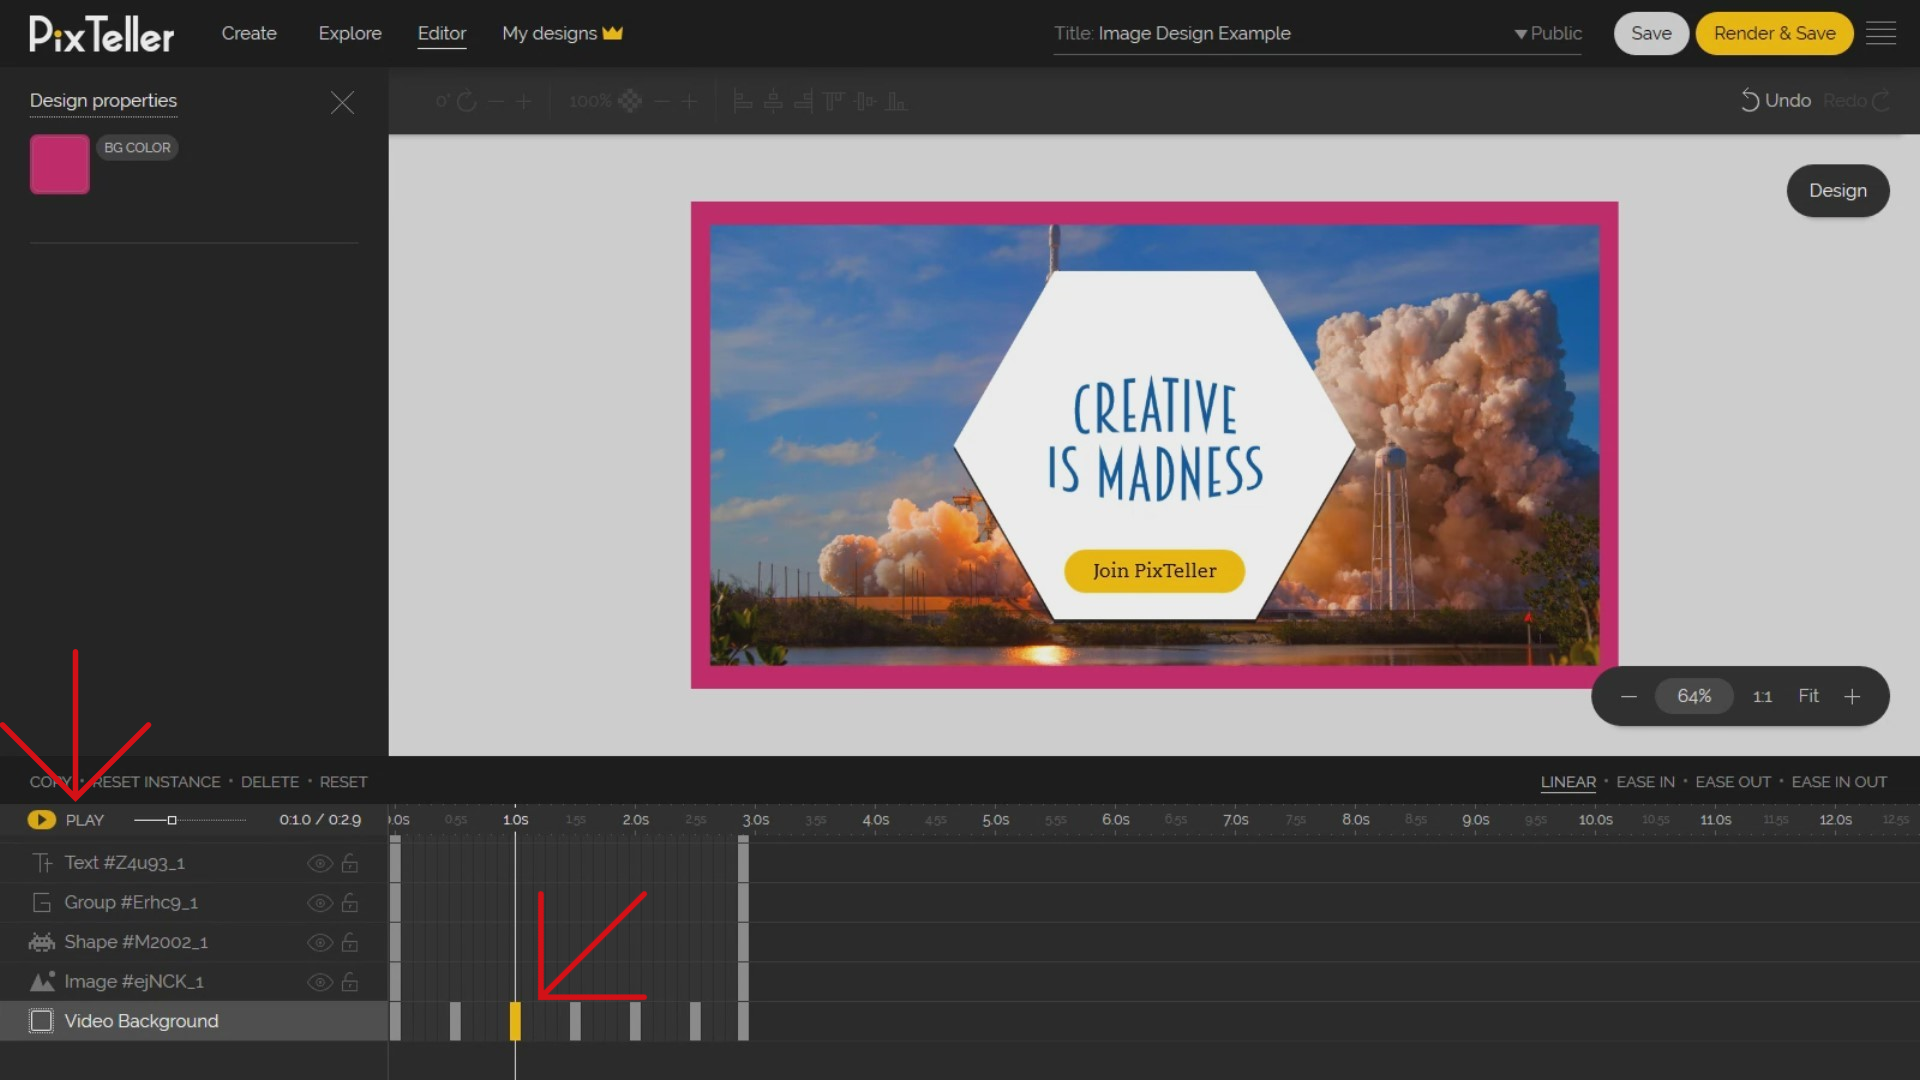
Keep in mind that for the background, you can create only background color video motions. As you already know, you cannot scale or move the video background color.
What's next?
Something incredible that we'll help us do unimaginable things. Hang tight because we are moving up.
Let's make an instance for the image element in the middle of the timeline, at the 1.5 seconds. To do this, I will select the image frame at the 1.5 seconds and click the "Add instance" button. Once the instance has been created, let's change the Image properties filters or effects.
I will open the Image Filters & Effects panel, and I will change the blur value and also the saturation value. I want to have an idea about what to expect. In this case, I can select any video frame and see what the result should be, or as an alternative, I could just click the animation preview "Play" button.
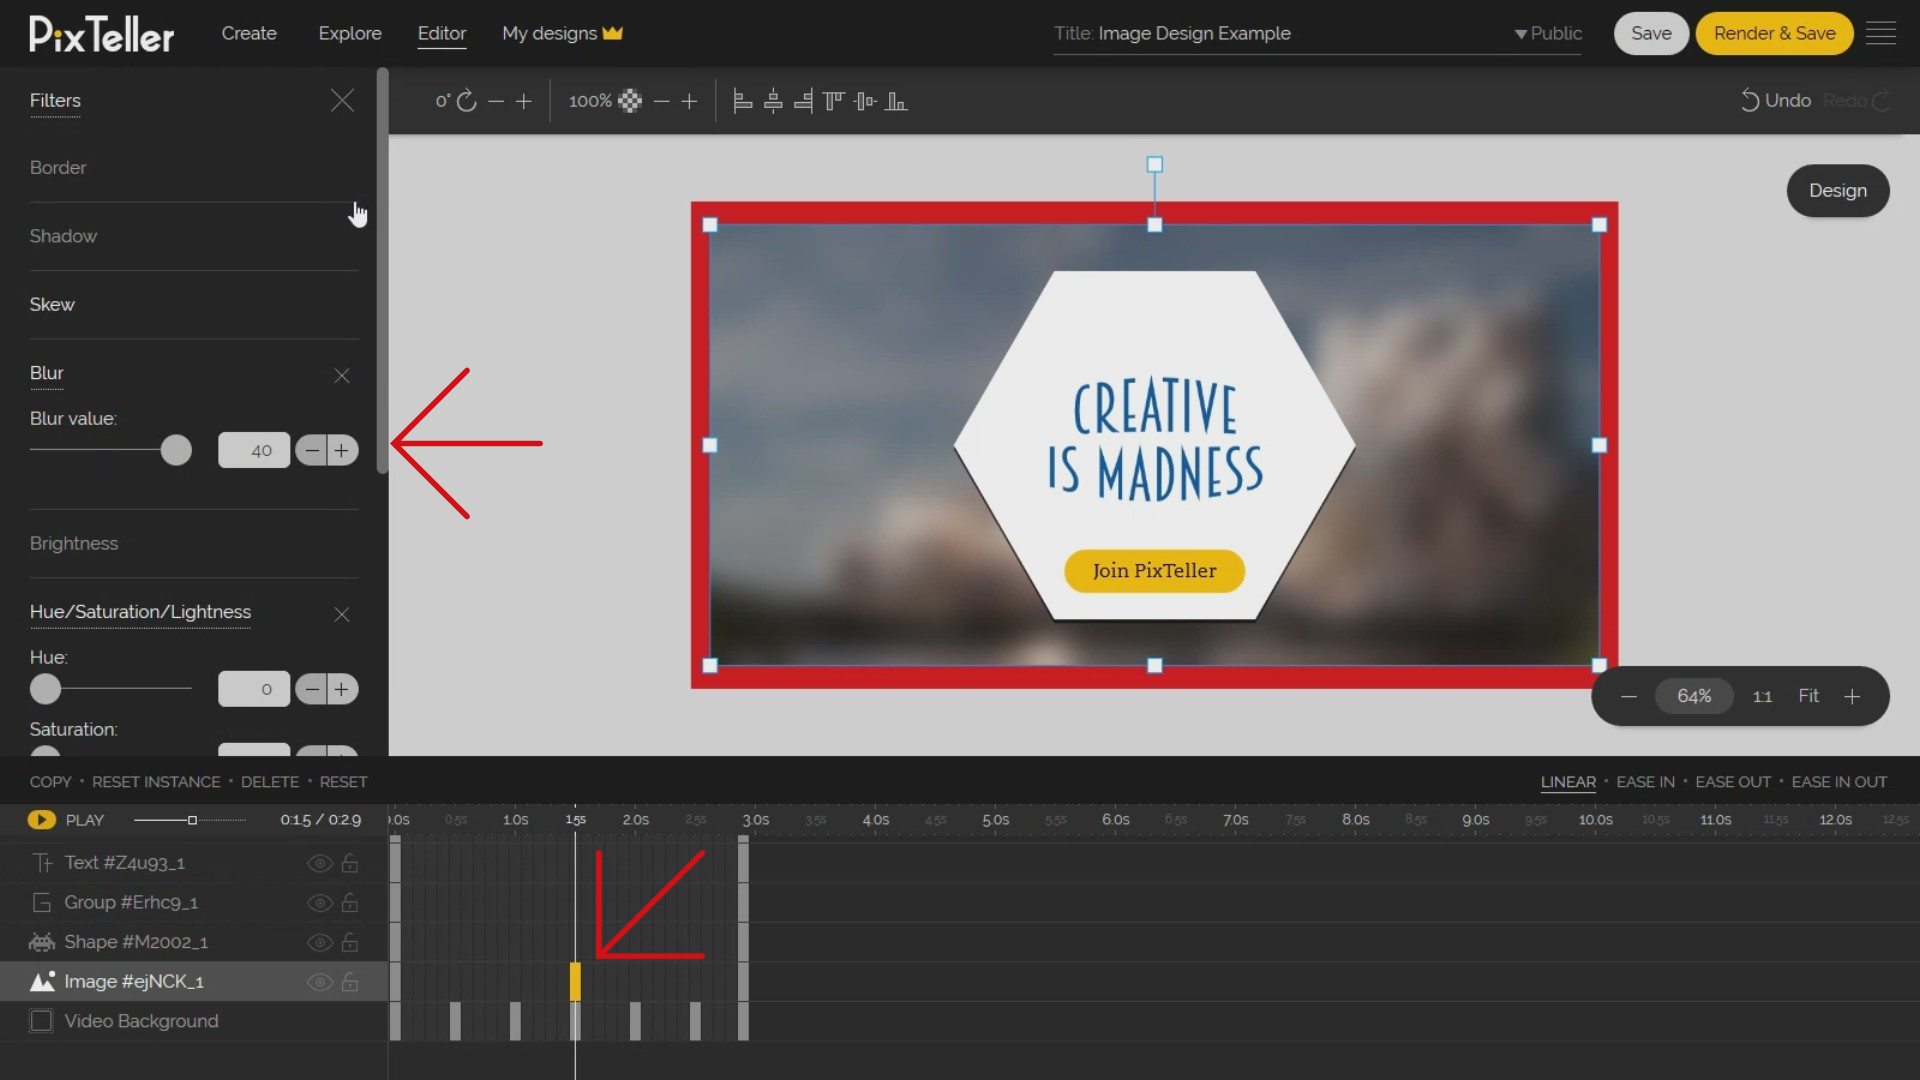
Right now, I will create two more instances for the big shape and for "Creativity is Madness" text. I will select the 1.5 seconds frame for each design element and I will click on the "Add instance button". Keep in mind that you can easily move any instances through the element timeline in case you need a different time.
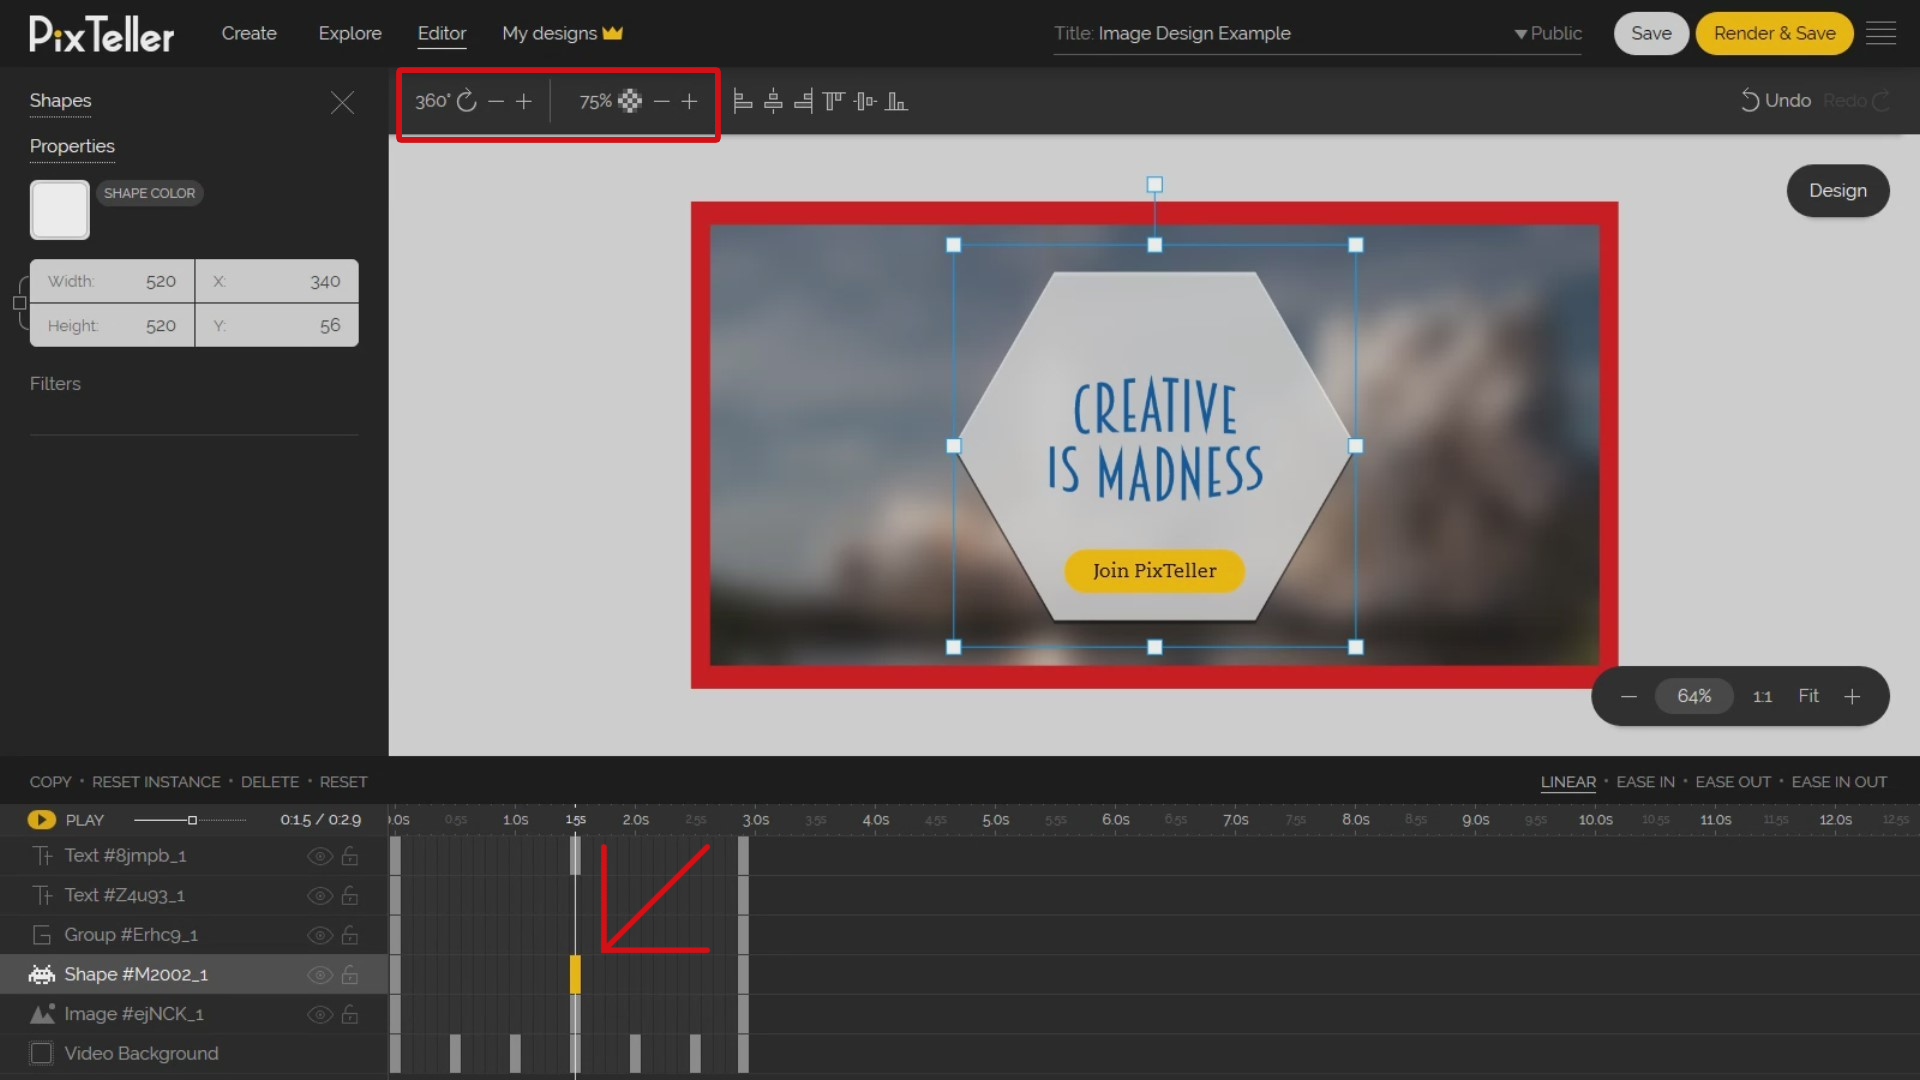
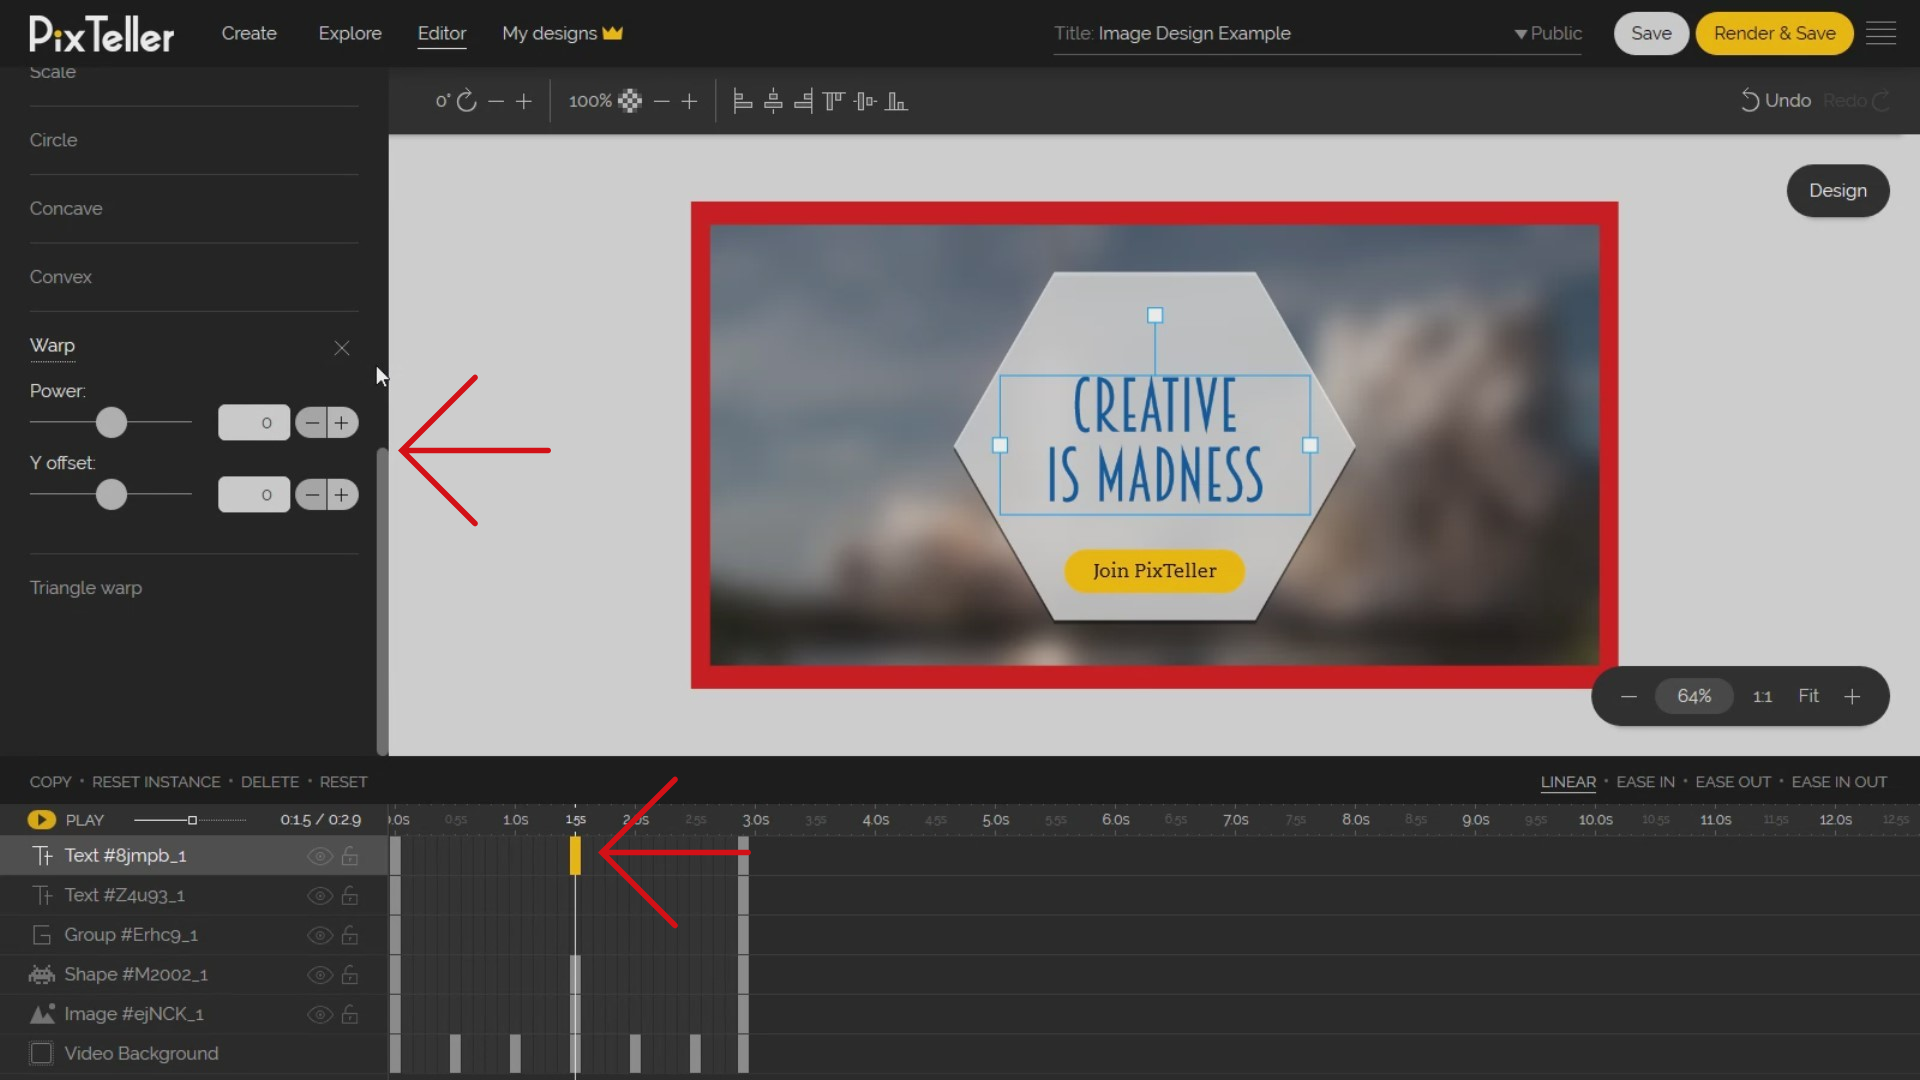
If you look here, for the new instance created for the big shape, I will apply a 360-degree rotation and a 75% opacity. For the 1.5 seconds instance of my "Creativity is madness" text element, I will open the text filters panel and I will set the warp filter power to zero.
Next, I will get into further details with some more advanced aspects.
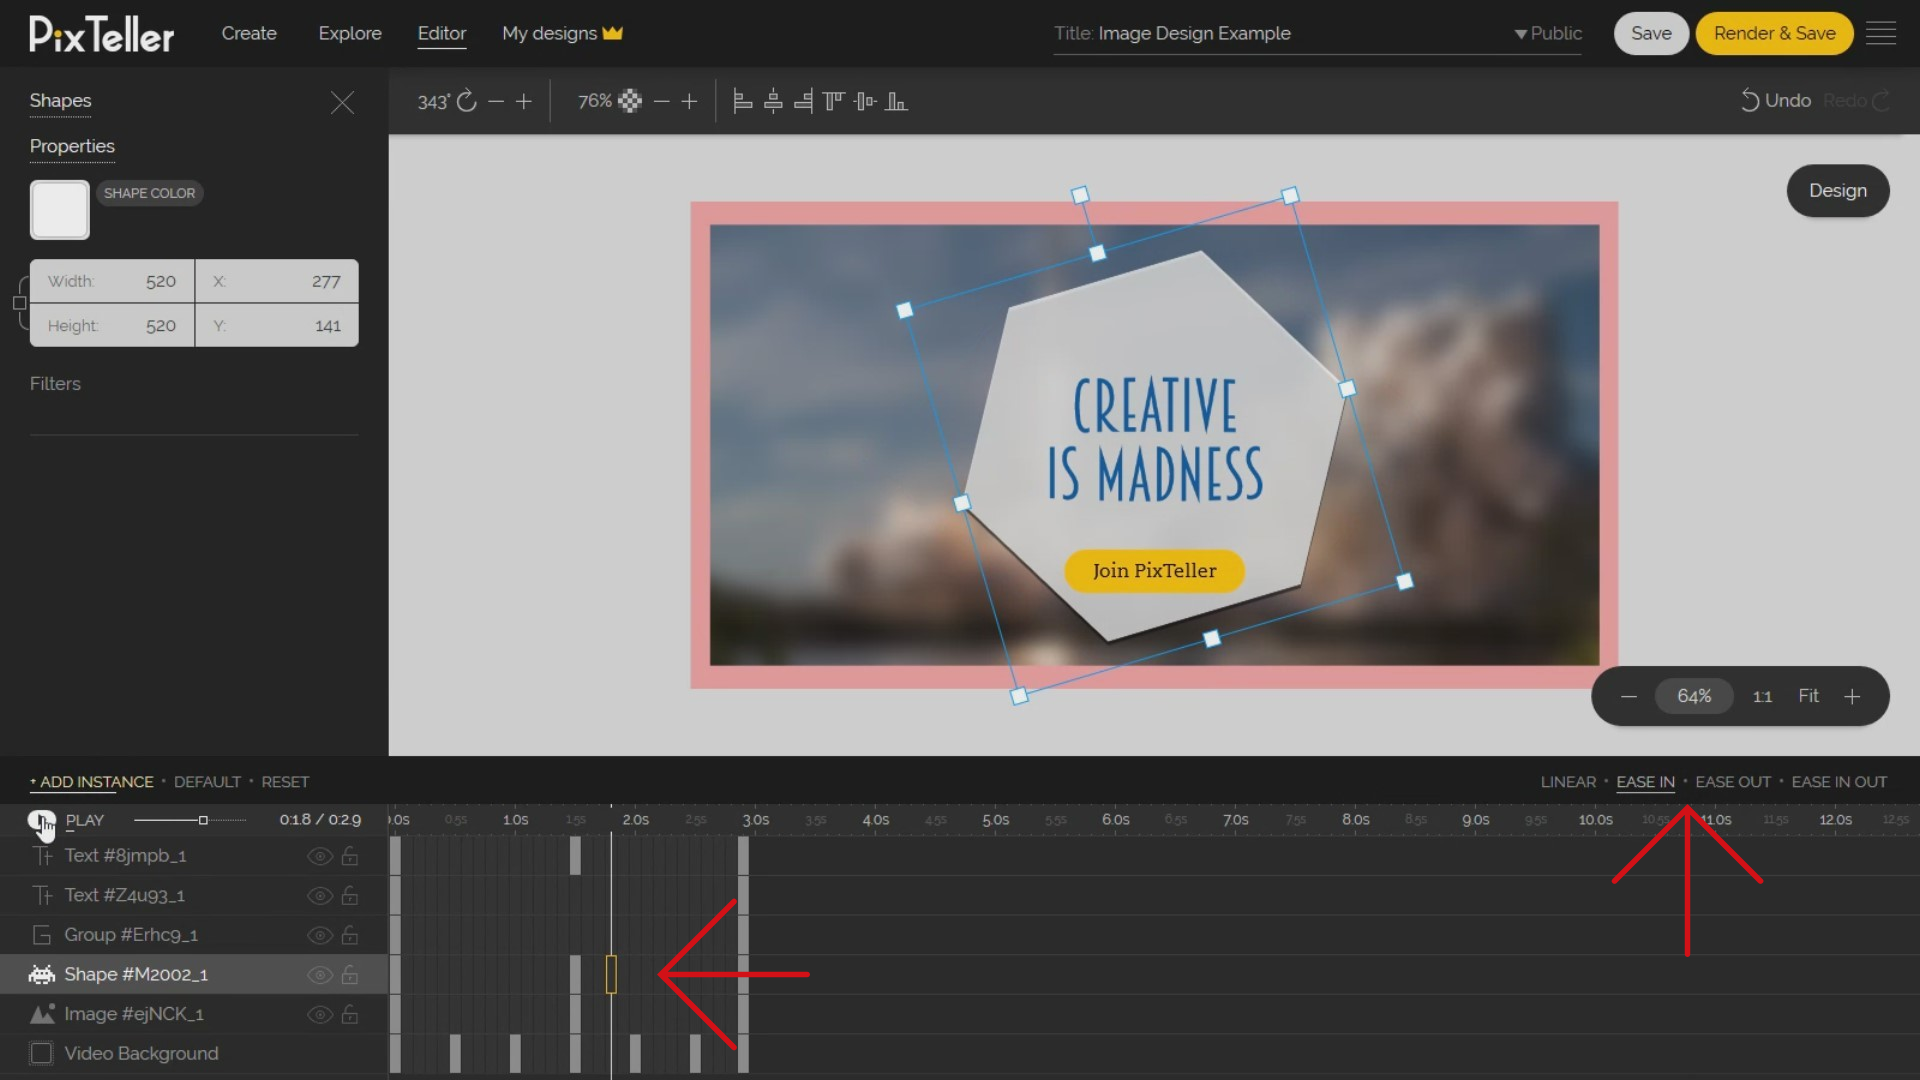
Let's set the acceleration for the shape. The default acceleration between 2 instances is linear. In my example, for the shape animation between 0 second and 1.5 seconds instances, I will set an "Ease out" acceleration, and for the shape animation between 1.5 second and the 2.9 seconds, I will set the "Ease in" acceleration.
To set or change the acceleration, you must select any frame between two instances, and click on the acceleration type from the top-right corner in the timeline section. Look closely as I demonstrate in my example. Got it? Great.
Now I want to create five new instances for the group button.
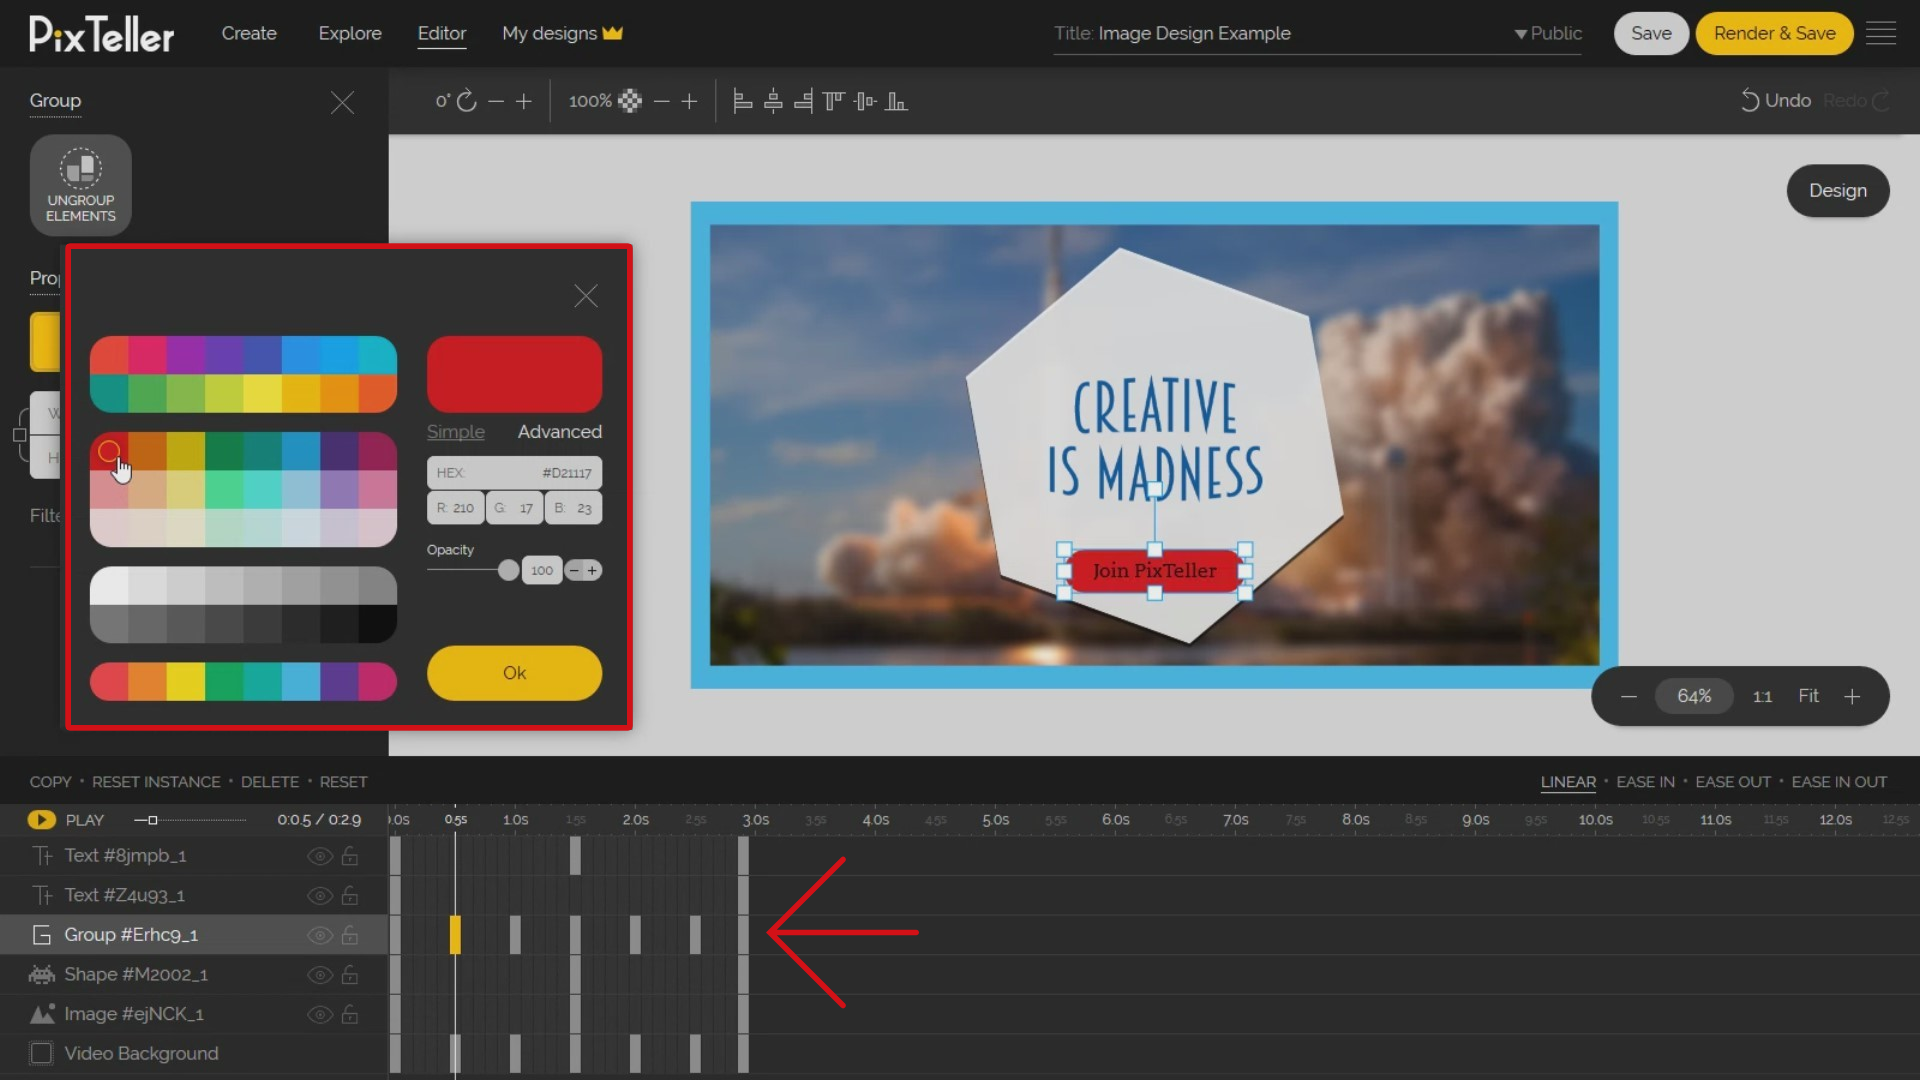
I will click on each 0.5 seconds frame, 1 second frame, 1.5 seconds frame, 2 seconds frame, and 2.5 seconds frame and add for each of them a new instance. For the instance at the 0.5 seconds of the group, I will change the color.
Next, I will copy the 0.5 seconds instance by pressing the "Copy" button from the top-left of the timeline section, and I will select and replace the 1.5 seconds and 2.5 seconds instance with it. Very useful is the copy/paste instance in the process of making the video.
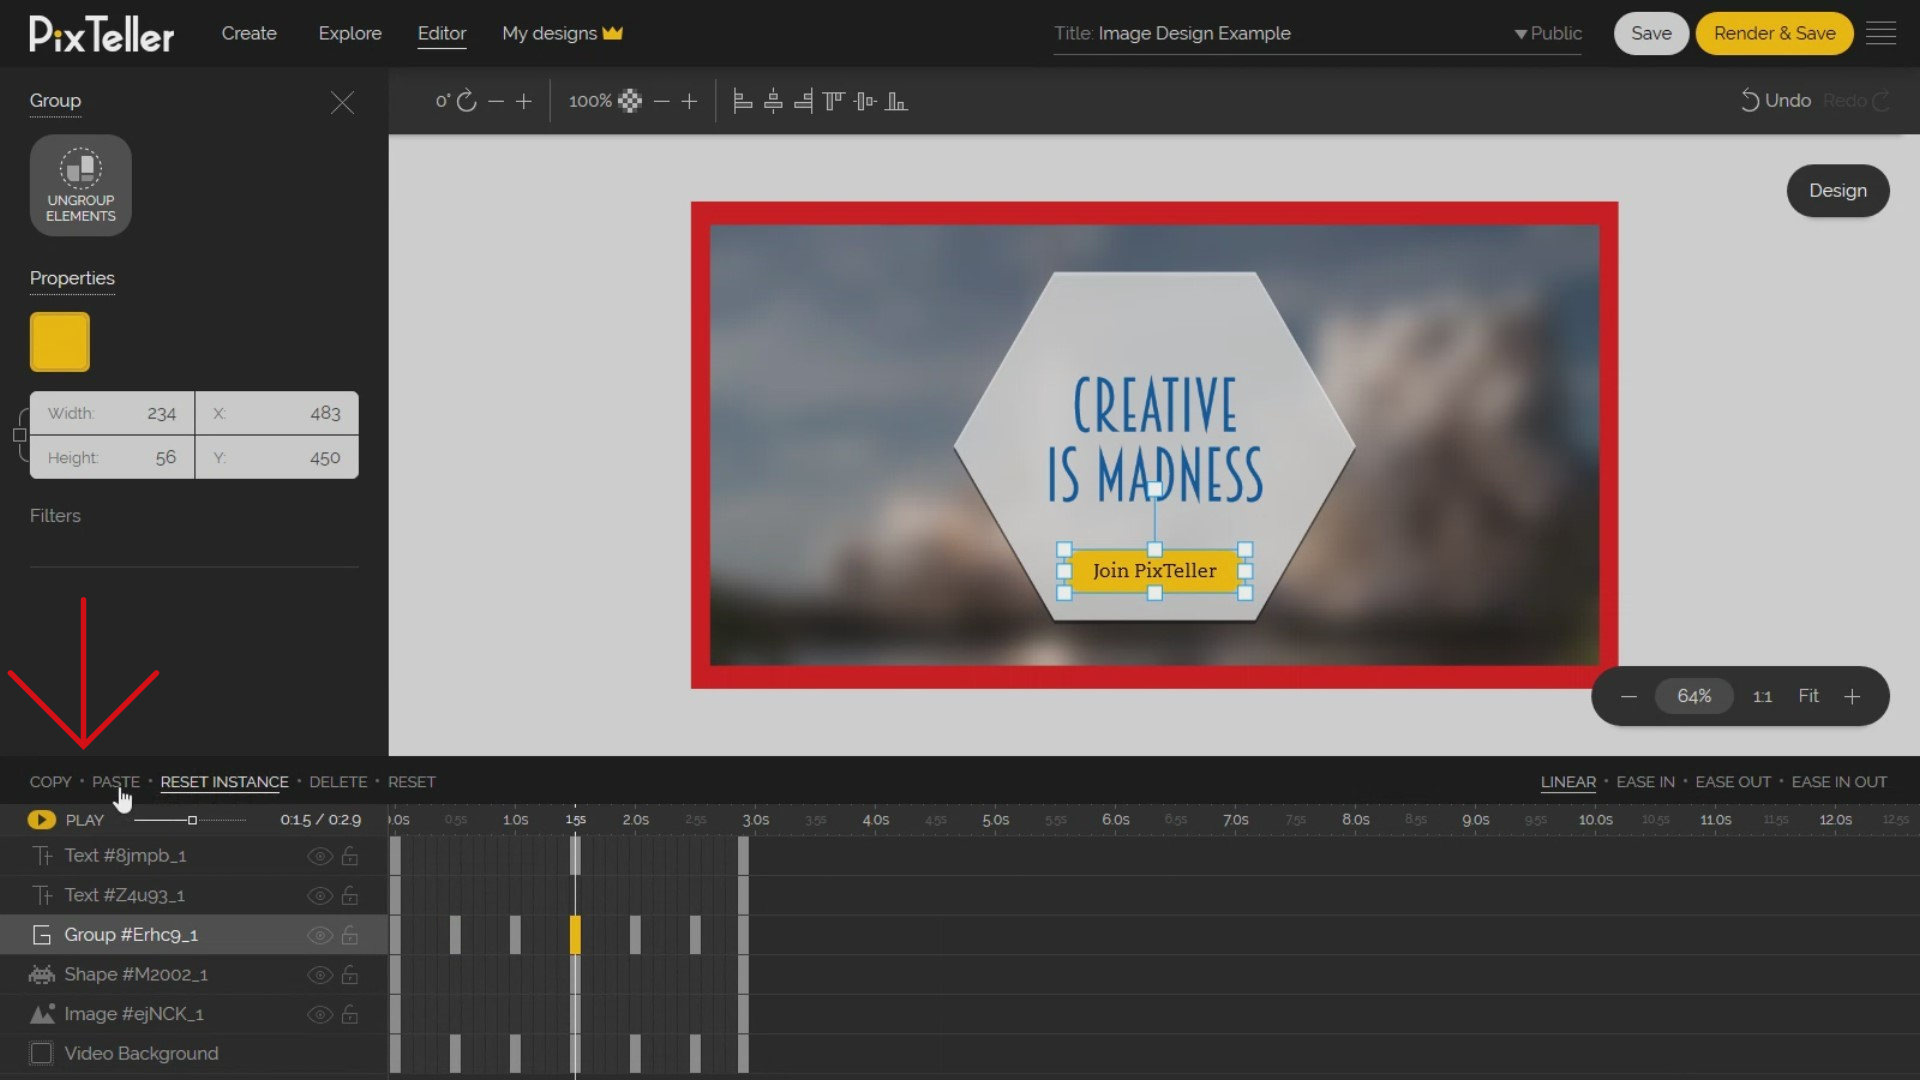
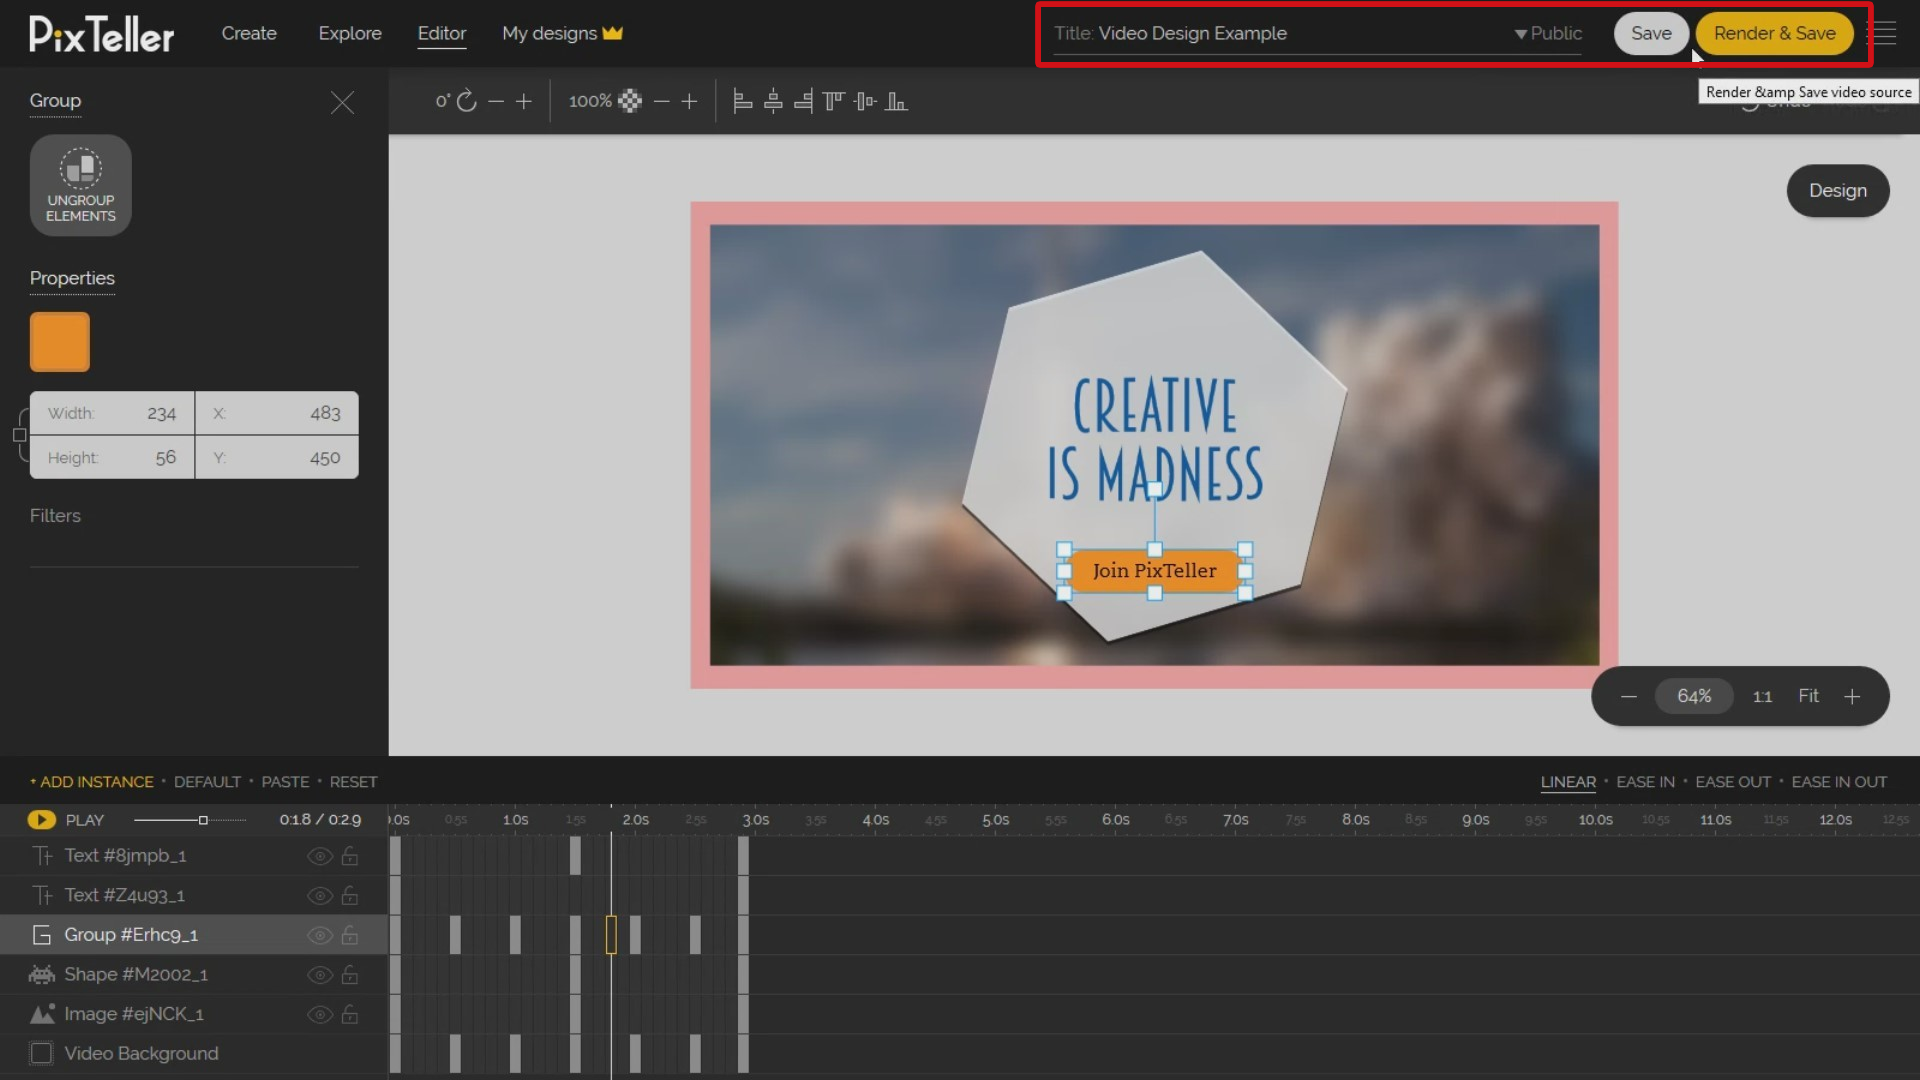
I think that's enough, so I will rename the title into a more relevant one. It's very important now to save the animation in order to download it.
In this case, you have two options located on the top-right corner. One is the Save button which will save your animation source code without render. This way, you will not be able to download the Video or Gif after the save. Also, this option is great when your work is in progress and you don't want to lose the steps you made up, until the save is executed.
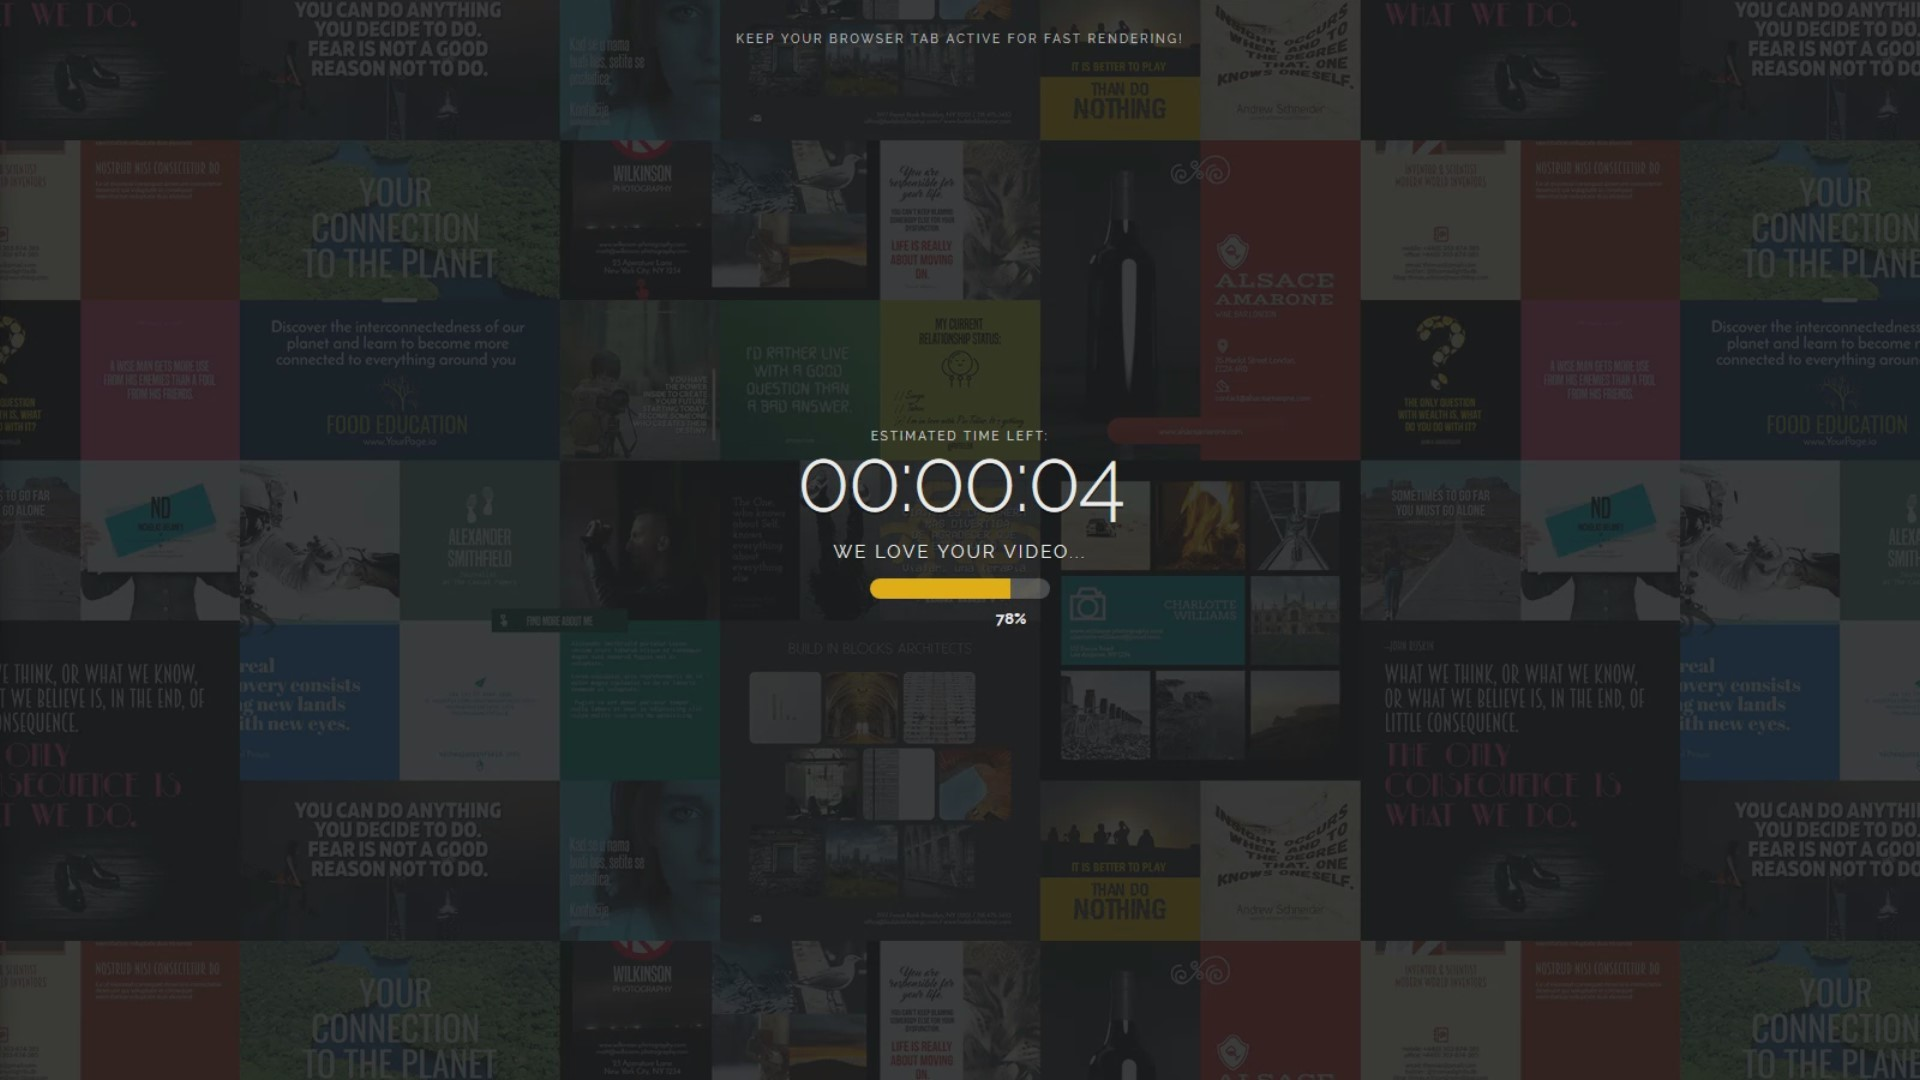
The second option is the "Render and Save" button that I will press it right now. This action will start to render and upload the animation, including the source code on our servers, so we can download it or use it at any moment.
Note: The time it takes to render depends on many factors, like the time and size of the animation, your computer power, and your internet upload speed. However, in most cases, for small-time length videos - a few seconds - the render and save time is under one minute.
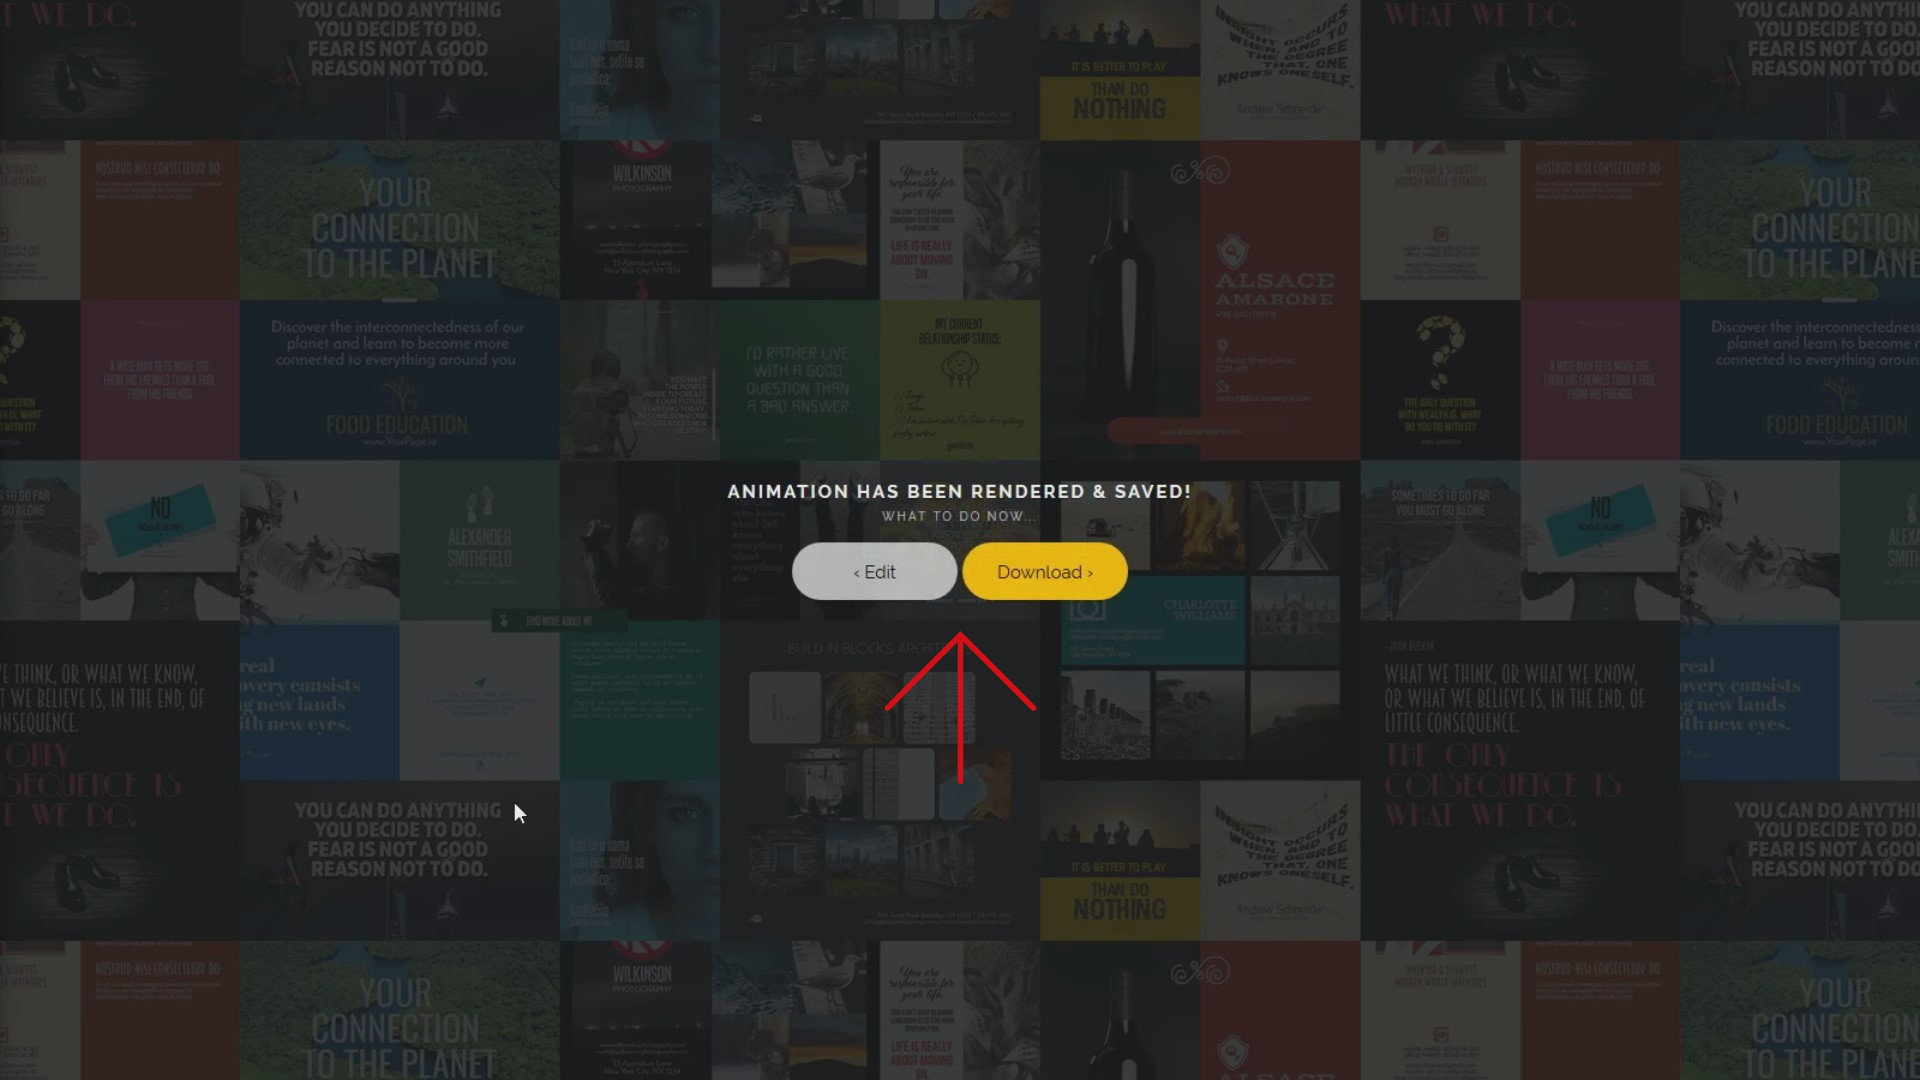
Once the render and save have been done, you will have to choose from two options: continue to edit your animation or click the Download button to be redirected on the preview page.
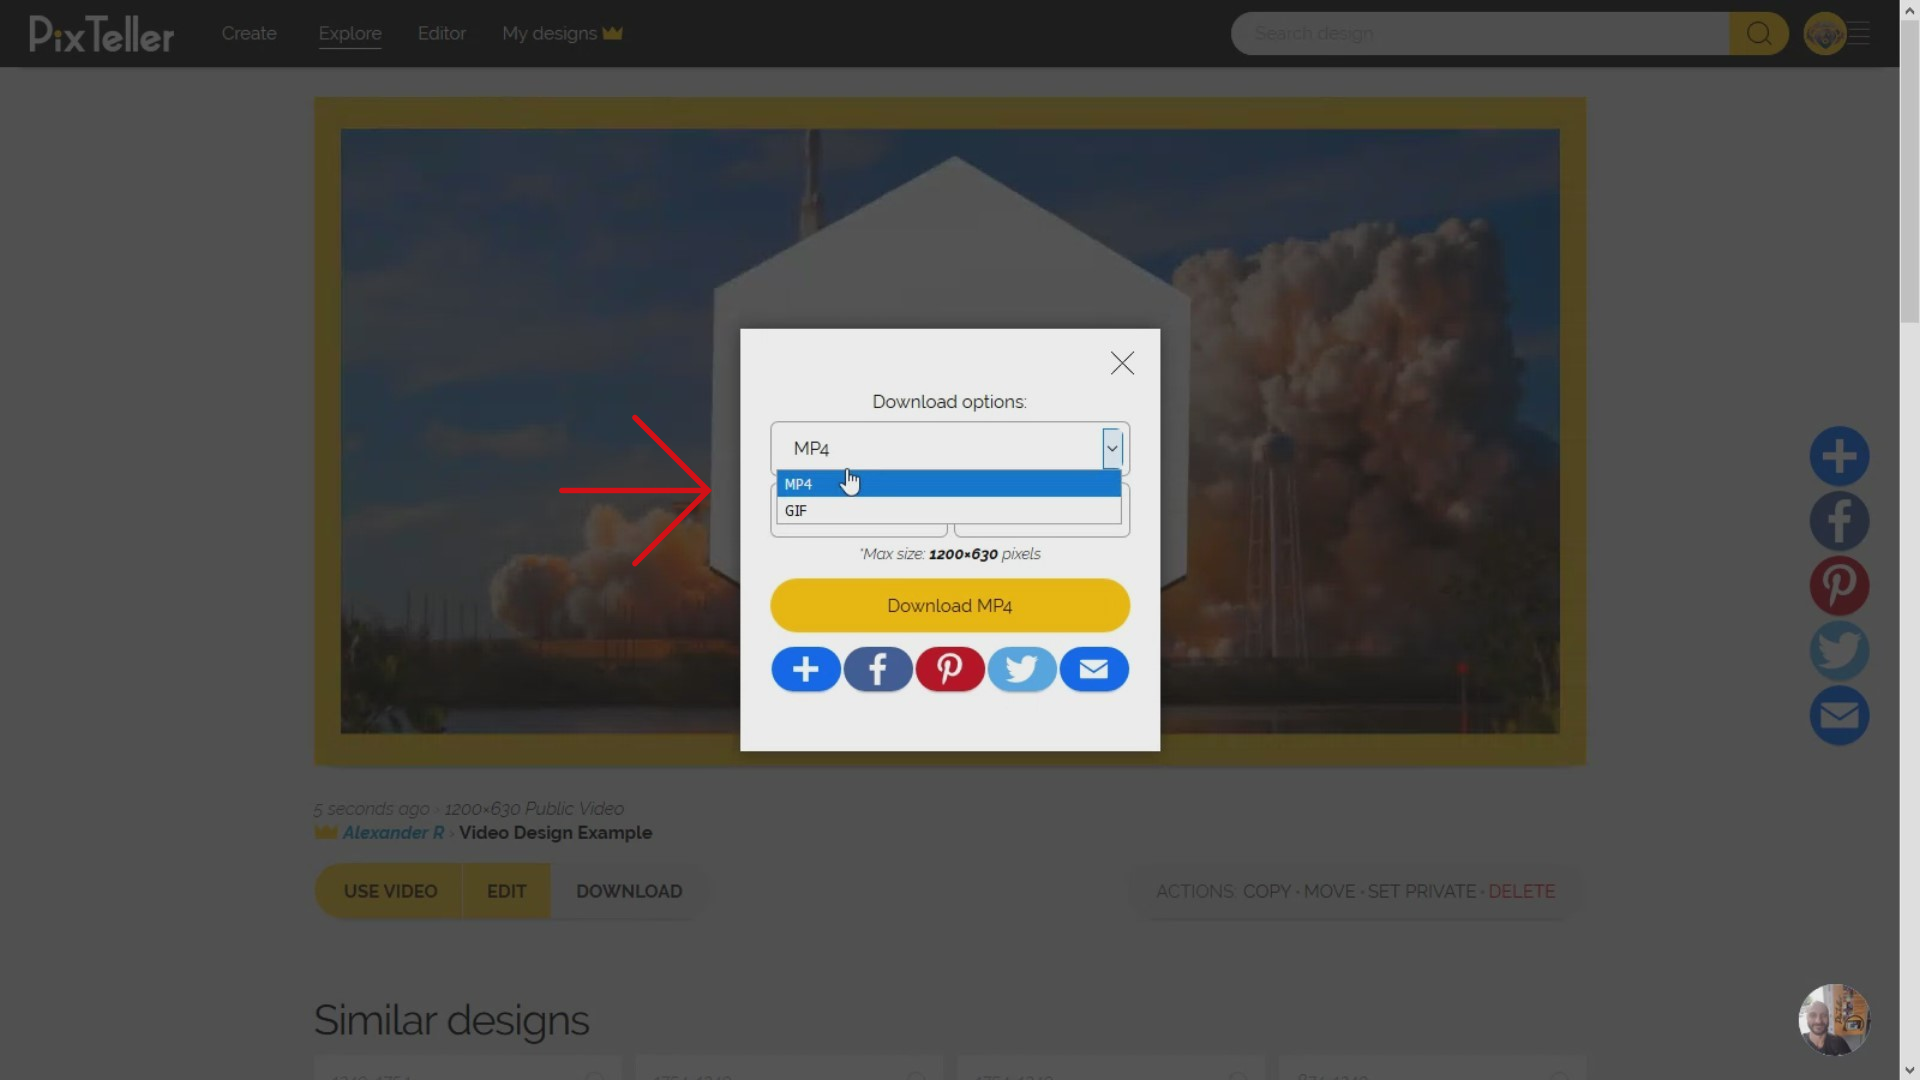
Now, from the Preview animation, you can click on the Download button and download it in MP4 video format or animated GIF format. What is really cool here, is that you can adjust the size by keeping the aspect ratio depending on your needs.
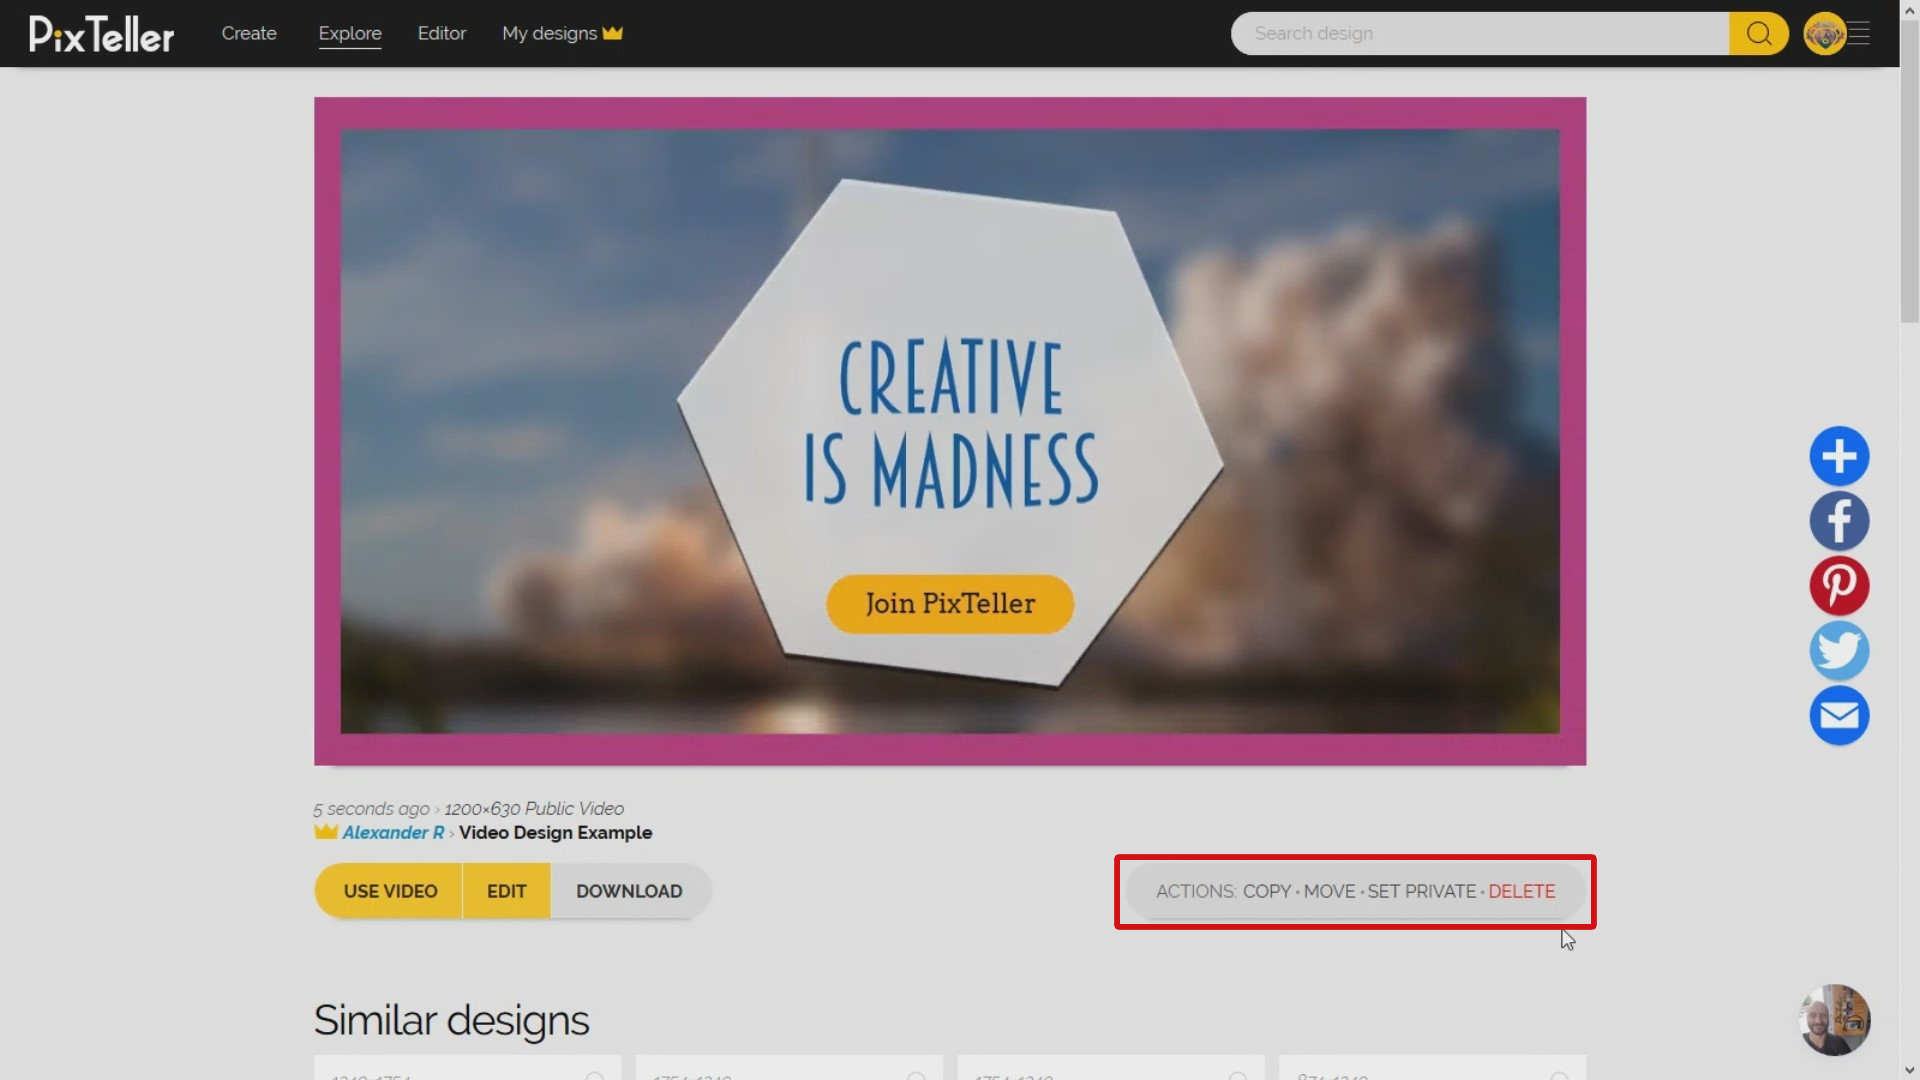
From the actions panel you have several options: you can Copy or Move the video on any of your folders, or you can update the privacy settings or delete them, like a regular design.
The biggest benefit of PixTeller is that anyone can use any premade image or animation design. By pressing the "Use" button I can easily replace some elements in design mode, go in animation mode, save and render. That's it, the animation maker will do the job for you!
Now you can download the animation in video or Gif format and it's ready to go viral.
Resulted animation
So the final outcome should look something like this. Nice, don't you agree? Find more animation templates to bring your ideas to completion.
Again, I'm Alex the PixTeller chief troublemaker, and I really hope you've enjoyed this tutorial. If you have any questions regarding the designs and what we did here today, don't hesitate to contact me. We truly want to make this whole experience an easy one, and most importantly, useful to you. Also, it is always very important if you have amazing graphics in your animations. You can always download graphic deals and incorporate inside your animations.
If you've found this tutorial practical and you want more, follow our blog for many tricks and tips that will make your visuals the best out there. Join PixTeller and design your own images, animated GIFs and short video animations for your websites, advertising campaigns, social media posts, mobile apps, print, business and more.
Have a great day and stay tuned for more!
Recommended posts
-
PixTeller Account Basics (FAQ)
Read More › -
How to Flip (Mirror-Reflect) Objects
Read More › -
Transparency & Opacity: How To Use Them
Read More › -
Creating, Saving, Downloading and Sharing your PixTeller images (FAQ)
Read More › -
How to Hide, Lock and Unlock the Elements Used in Your Design
Read More › -
How to Use the Line & Pencil Tools
Read More ›
